
DIY Duck Furniture Crate: A Stylish and Practical Night Home for Ducks
Last updated: February 28th, 2026
To keep our research-backed guides free, this site uses ads and affiliate links (earning a small commission at no cost to you). Everything here is created by a duck mom and PhD scientist, combining academic rigor with hands-on experience to provide practical, trustworthy advice for duck keepers everywhere. 🦆 Learn more
Keeping pet ducks indoors overnight can be a challenge. While dogs and cats have plenty of options for stylish furniture crates, ducks are often left out of the equation. The commercial versions for dogs may look nice in a living room, but they come with problems for duck owners: the openings are too wide, bedding falls out, and cleaning can quickly turn into a headache.
For us, it was important that our ducks not only had a secure and comfortable place to spend the night, but also one that blended seamlessly with our home. We wanted something that looked like it belonged with the rest of our furniture. Neat, polished, and in the right color, while also being entirely practical for duck life. That meant waterproof surfaces, excellent ventilation, easy access for cleaning, and enough space for two ducks to sleep side by side.
This project became even more personal with Muffin and Krümel in mind. Muffin is still a young duckling, small and adventurous, while Krümel is her steady companion and best friend. At night, they like to be close together, and we wanted to give them a safe indoor space that supported their bond. A dog crate wasn’t going to cut it, so we designed and built our own.
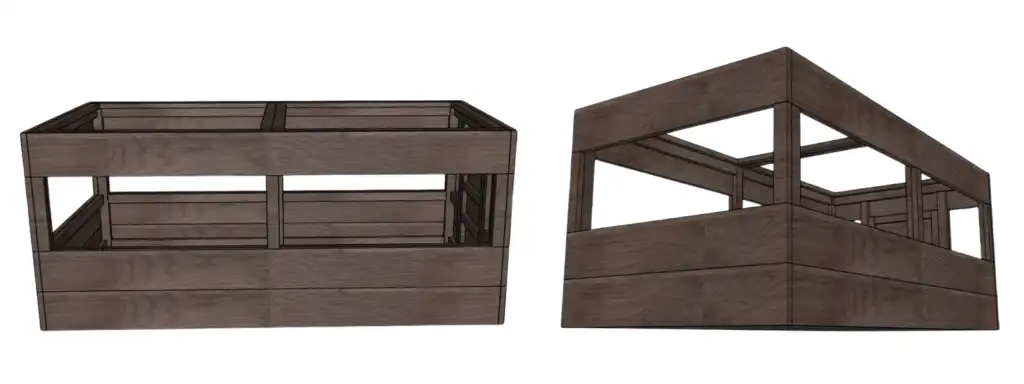
As with many of our DIY duck projects, we began with a detailed plan. I created a CAD design to visualize the final piece and make sure every measurement and feature would work as intended. From there, it was a matter of choosing the right materials, staining and sealing the wood for durability, and building a crate that is both beautiful and functional.
The result is a furniture-style duck crate that not only provides a safe overnight home for Muffin and Krümel but also adds a warm and practical touch to our living space.
This is how we designed and built Muffin and Krümel’s duck crate.
Part of the Housing & Environment Hub, Engineering safe, bio-appropriate habitats for backyard flocks.
Quick Navigation: Jump to a Section
[hide]
Planning the Design
Like with many of our duck projects, we started with careful planning. I created a CAD model to sketch out the dimensions and test how it would fit with our existing furniture. The goals were clear:
- Big enough for two ducks at night.
- Easy to clean and water-resistant.
- Well-ventilated and secure.
- Styled to match the rest of our furniture.
- Equipped with a ramp door for the ducks’ comfort.
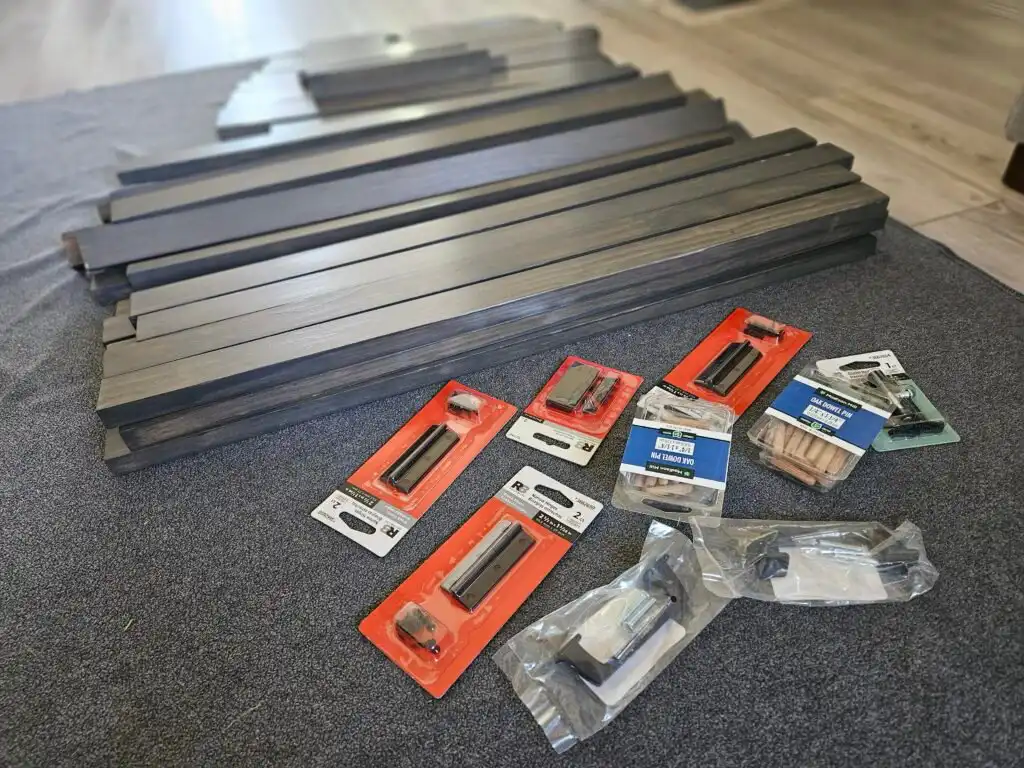
Materials We Used
- Frame: 1-in x 2-in x 8-ft Unfinished Select S4S Pine Common Softwood Board
- Outer Panels/Trim: Patriot Timber Products SurePly 1/4-in x 4-ft x 8-ft Sanded Plywood Underlayment
- Base Plate: 1/2-in x 4-ft x 8-ft Maple Sanded Plywood
- Ventilation Panels: 1/2-inch black polymer-coated hardware cloth
- Flooring: Sheet vinyl (for easy cleaning and water resistance)
- Fasteners: Wood dowels with wood glue, screws, and trim attached with a nail gun
- Coating: Primer, three coats of wood stain (color of choice), followed by three layers of polyurethane (PU) for durability and washability
- Other: Small hinges (for the ramp door), removable top frames with hardware cloth, caster wheels for mobility, and double-sided tape to attach the vinyl flooring.
Tools We Used
Having the right tools made the project go much more smoothly. Here’s what we used to build the duck furniture crate:
- Measuring tape & carpenter’s square – for accurate cuts and keeping corners square
- Circular saw or table saw – to cut the boards and plywood panels to size
- Jigsaw – for smaller or curved cuts if needed
- Power drill with drill bits – for pre-drilling holes and driving screws
- Clamps – to hold boards steady while gluing or screwing
- Wood glue – used with dowels for clean, strong joints
- Doweling jig (optional) – helps align dowels perfectly
- Screwdriver (manual or power) – for fastening hardware and hinges
- Nail gun (or hammer and finishing nails) – for attaching trim and panels
- Staple gun – for securing hardware cloth and vinyl flooring
- Sandpaper or power sander – to smooth all wood pieces before staining
- Paintbrushes or rags – for applying stain and polyurethane
- Protective gear – gloves, dust mask, and safety glasses for cutting and staining
- Utility knife – for trimming vinyl flooring cleanly
- Hinges and latch installation tools – small screws and screwdriver for the ramp door
Step-by-Step Building Guide
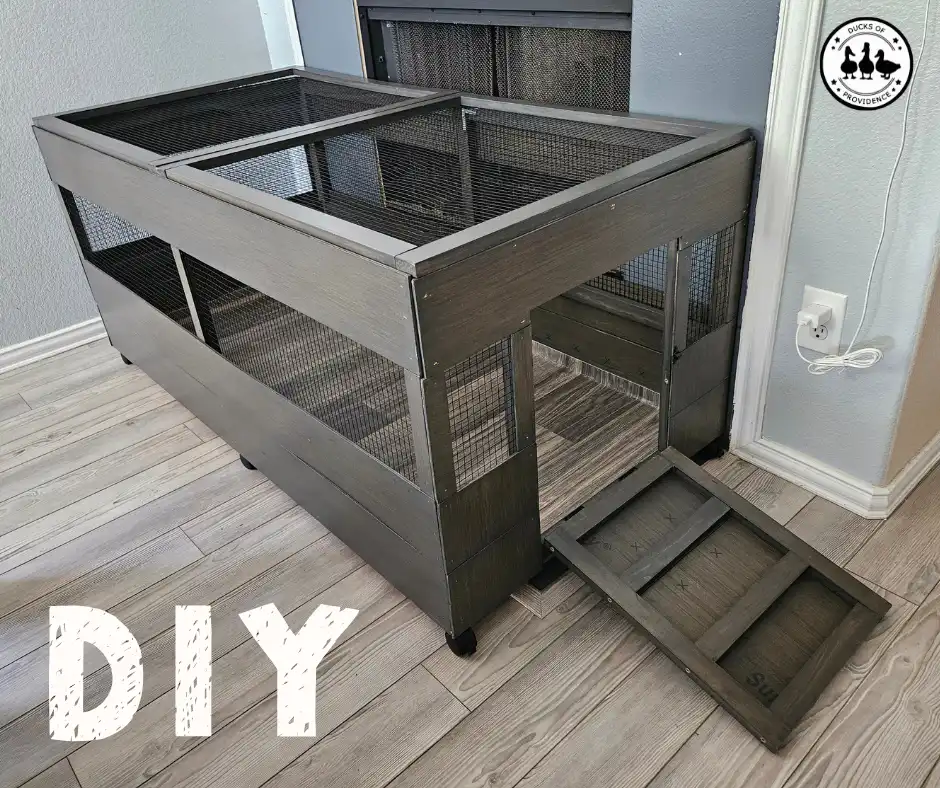
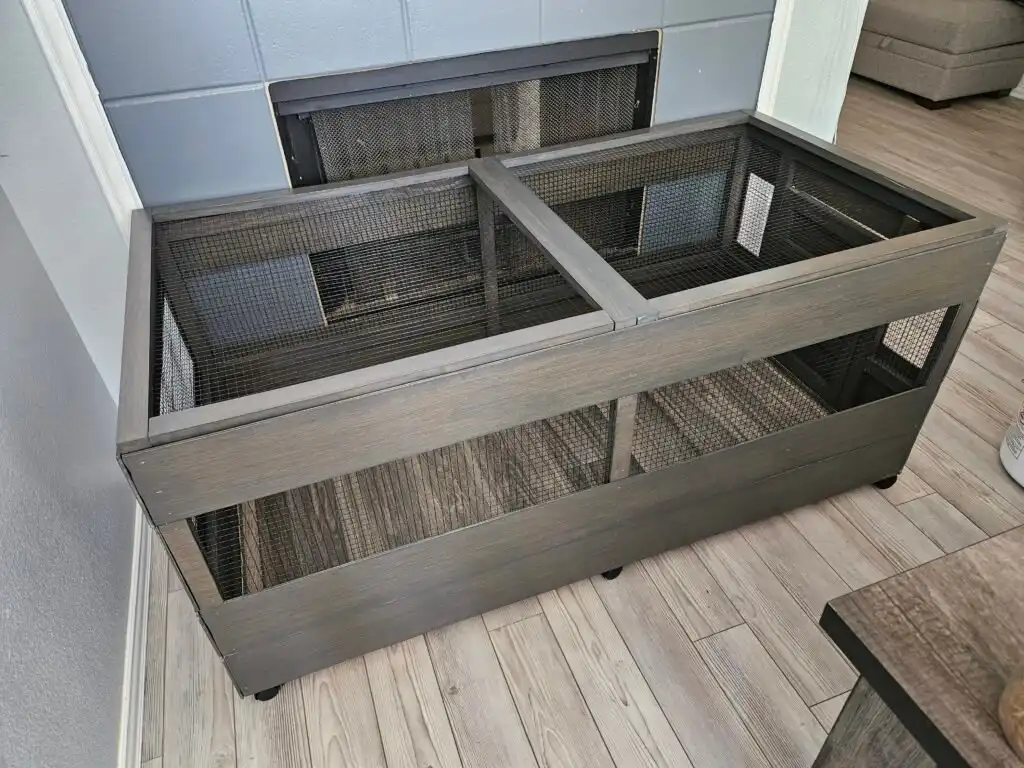
Before diving into the details, here’s the size we settled on: the finished crate measures 30 inches deep, 60 inches wide, and 24 inches tall (not including the caster wheels underneath). This gives plenty of room for two ducks to sleep side by side, move around, and stretch their wings a bit, while still keeping the crate compact enough to fit neatly into our living space.
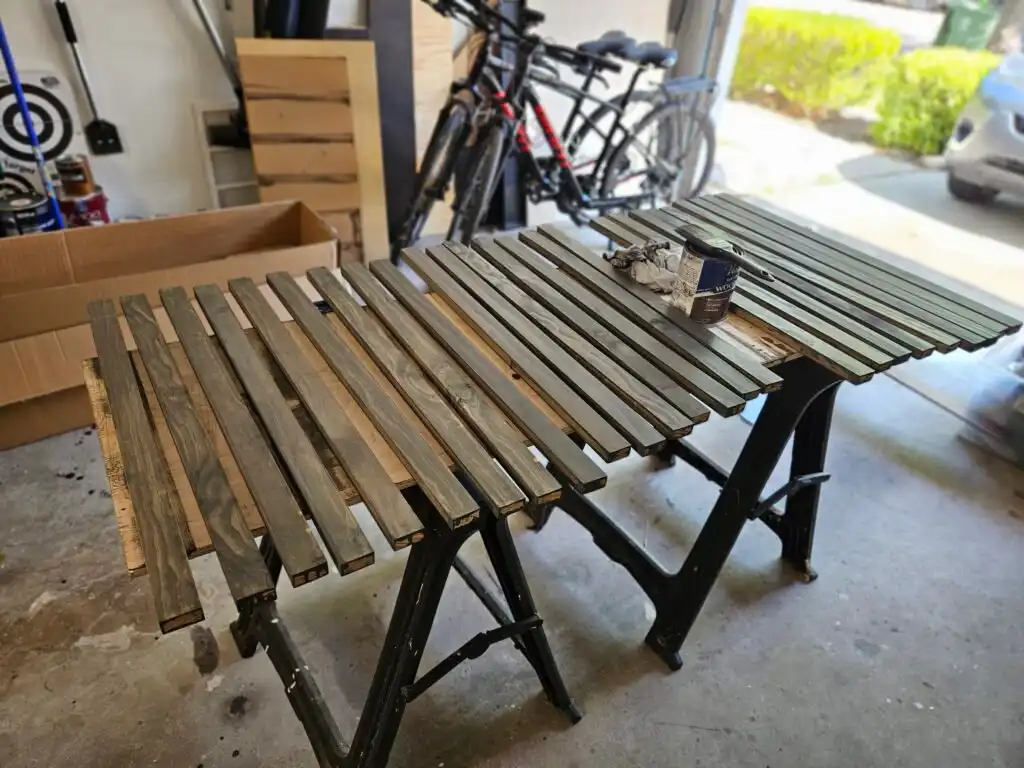
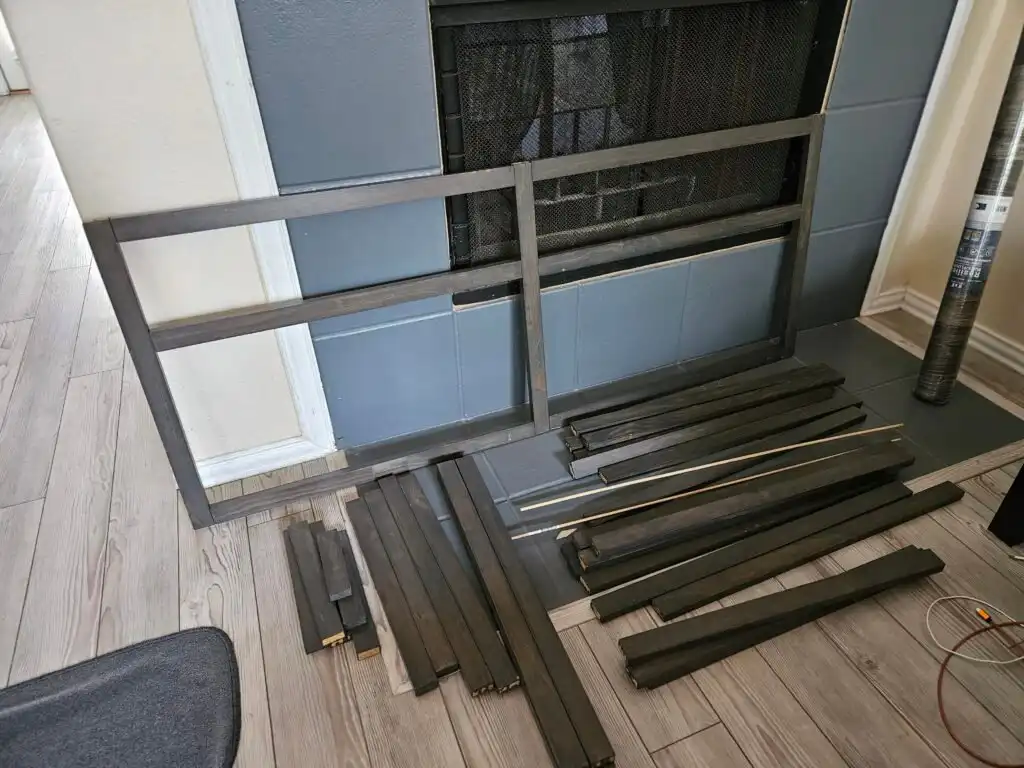
1. Cut and Prepare the Wood
The first step was measuring and cutting all the boards for the frame and trim. We used 1×2 pine boards for the skeleton, cutting them to match the CAD design dimensions. Accuracy here makes a huge difference later. Straight, even cuts mean the whole crate will fit together more securely.
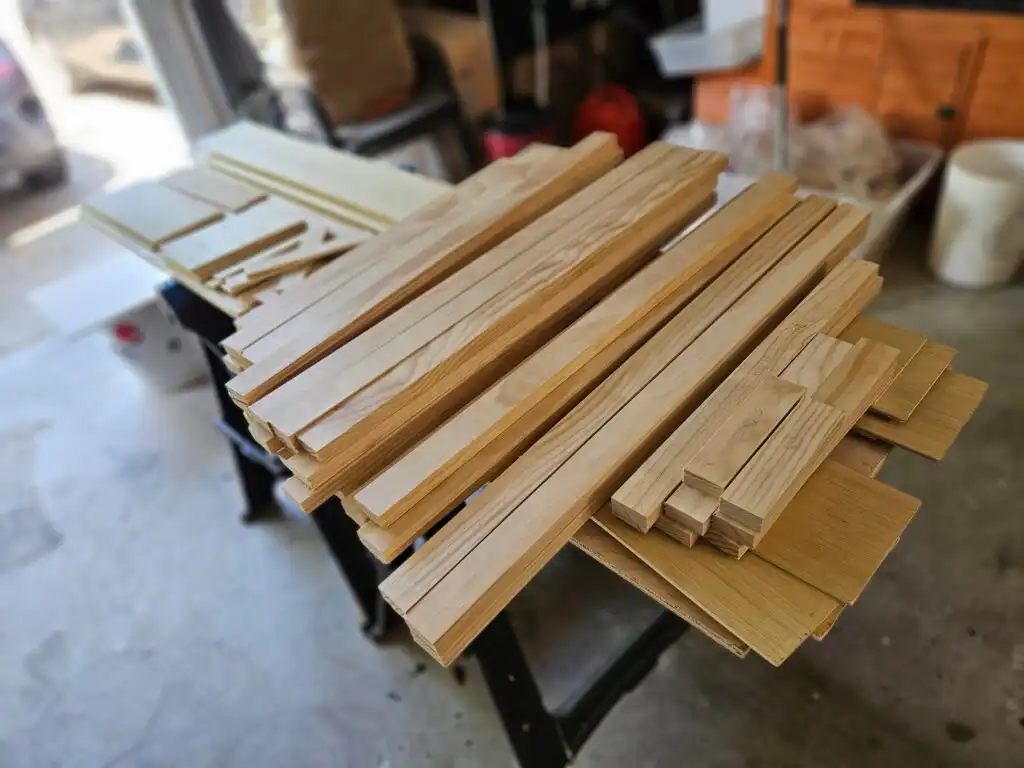

After cutting, we sanded the edges of each piece to prevent splinters and to make the staining process smoother. This is also the time to cut the larger plywood pieces for the bottom and side panels.
2. Stain and Seal
We chose to stain the wood before assembly. Staining and sealing after the crate is built can be tricky, especially with all the nooks around the hardware cloth. Doing it in advance ensures full coverage and saves time later.
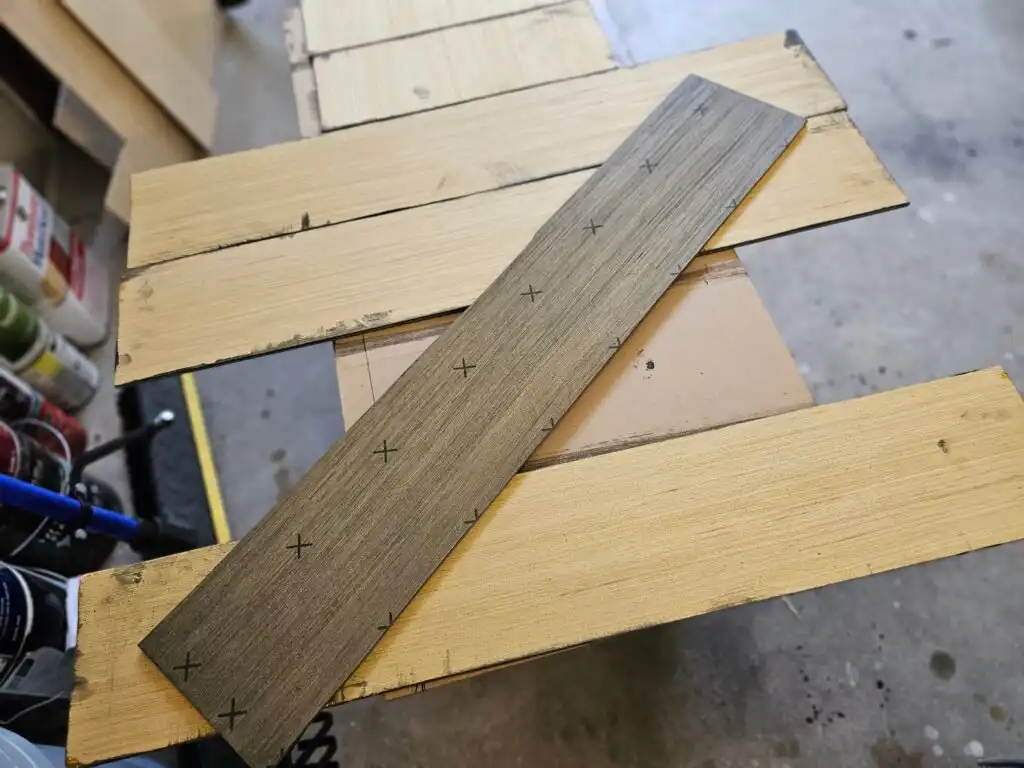
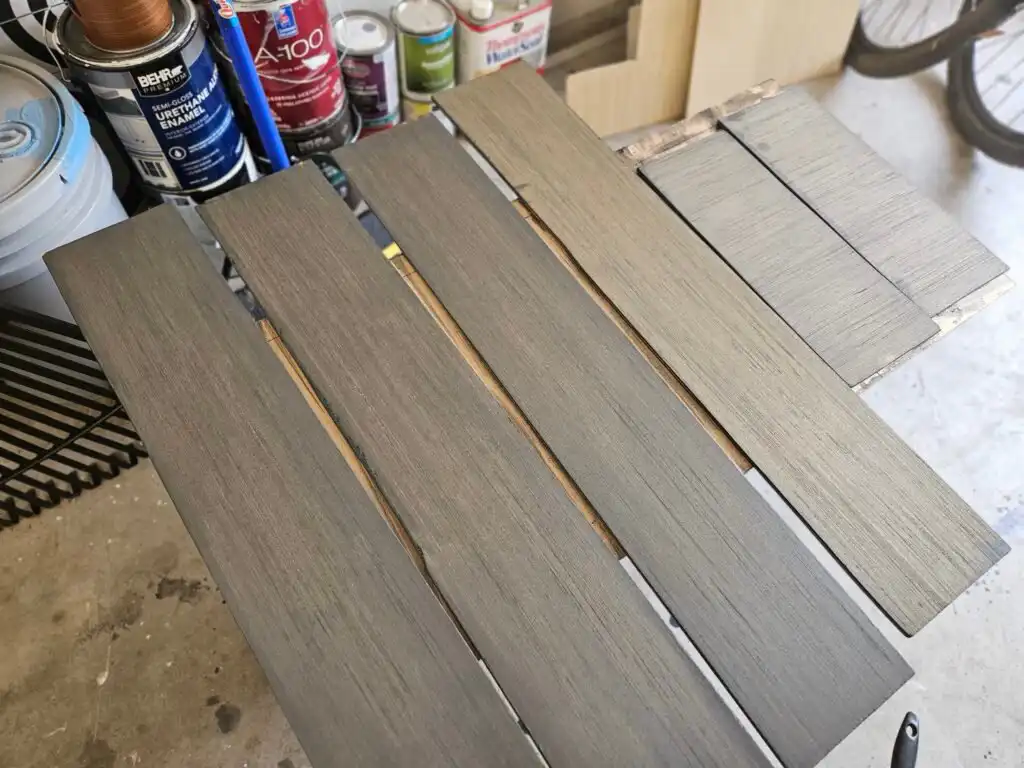
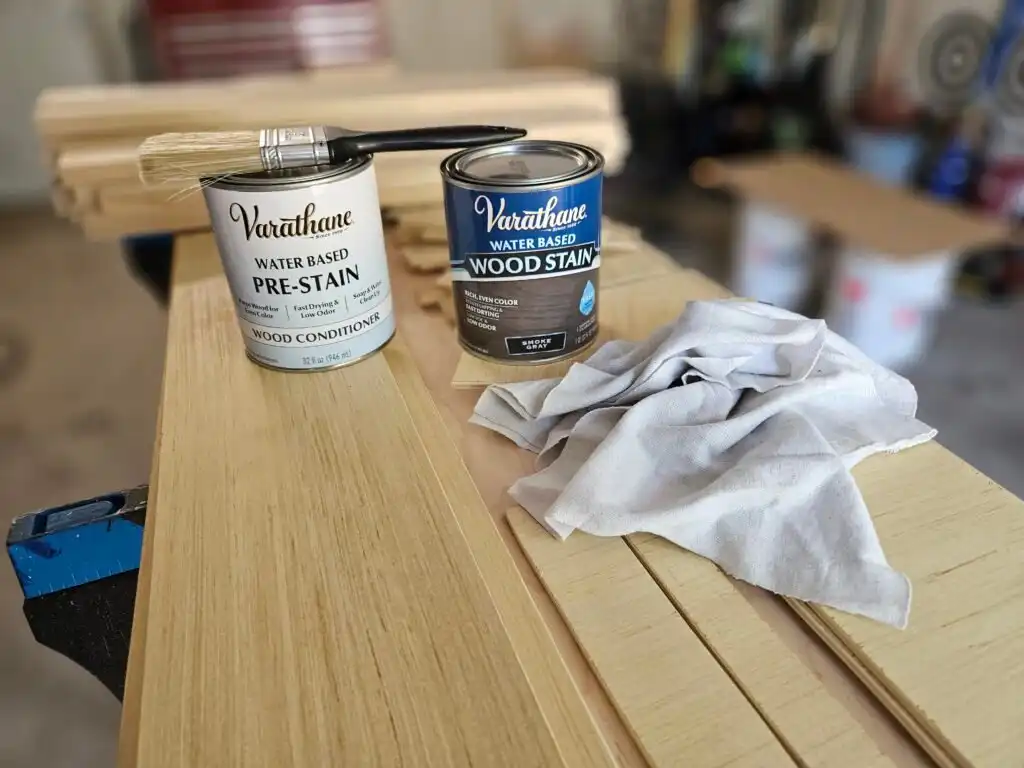
We started with a primer coat (Varathane 381123 Water Based Pre-Stain Wood Conditioner), followed by three coats of wood stain in our chosen color (Varathane 381121 Water-Based Wood Stain in Smoke Gray). Once fully dry, we added three layers of polyurethane (PU) coating. This makes the wood water-resistant and washable, an absolute must for ducks.
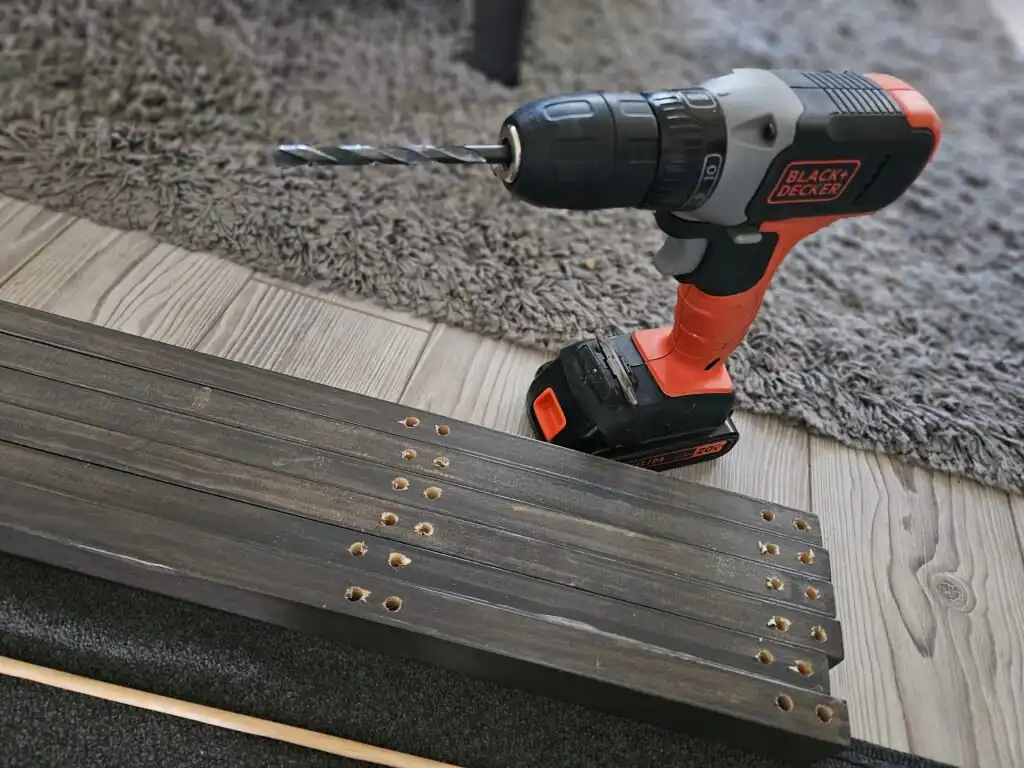
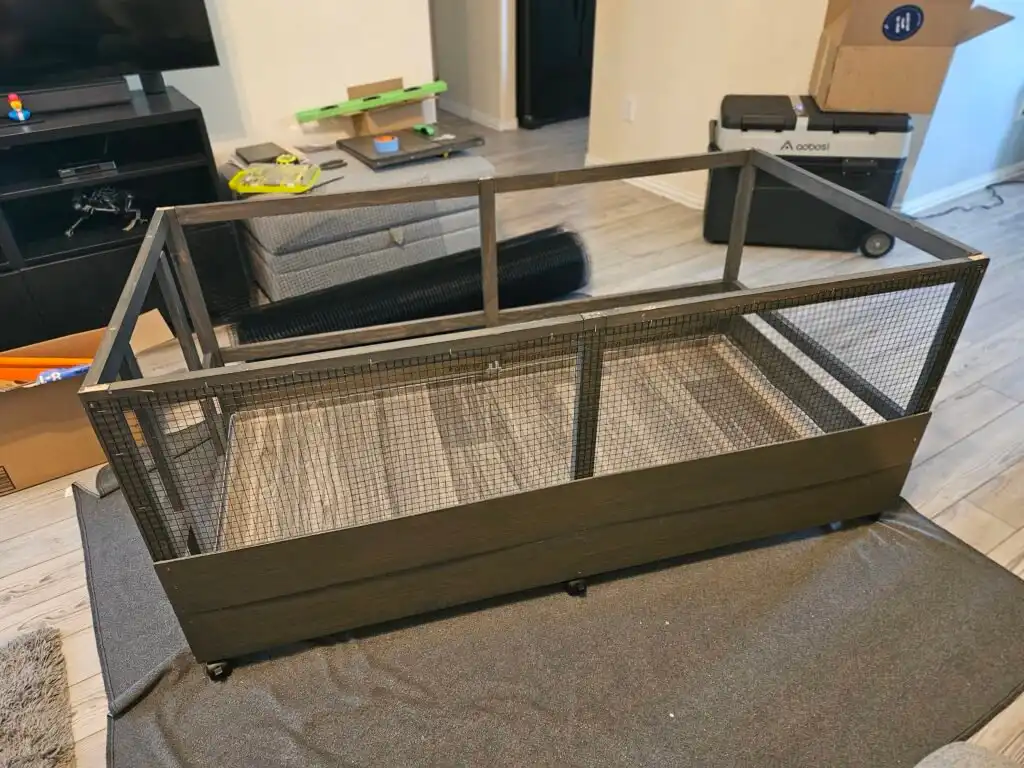
3. Assemble the Frame
With the wood prepared, we built the base frame first. We used a combination of wood dowels with glue and screws to secure the joints. Wood dowels gave a cleaner look for visible areas, while screws added strength in spots that needed extra durability.
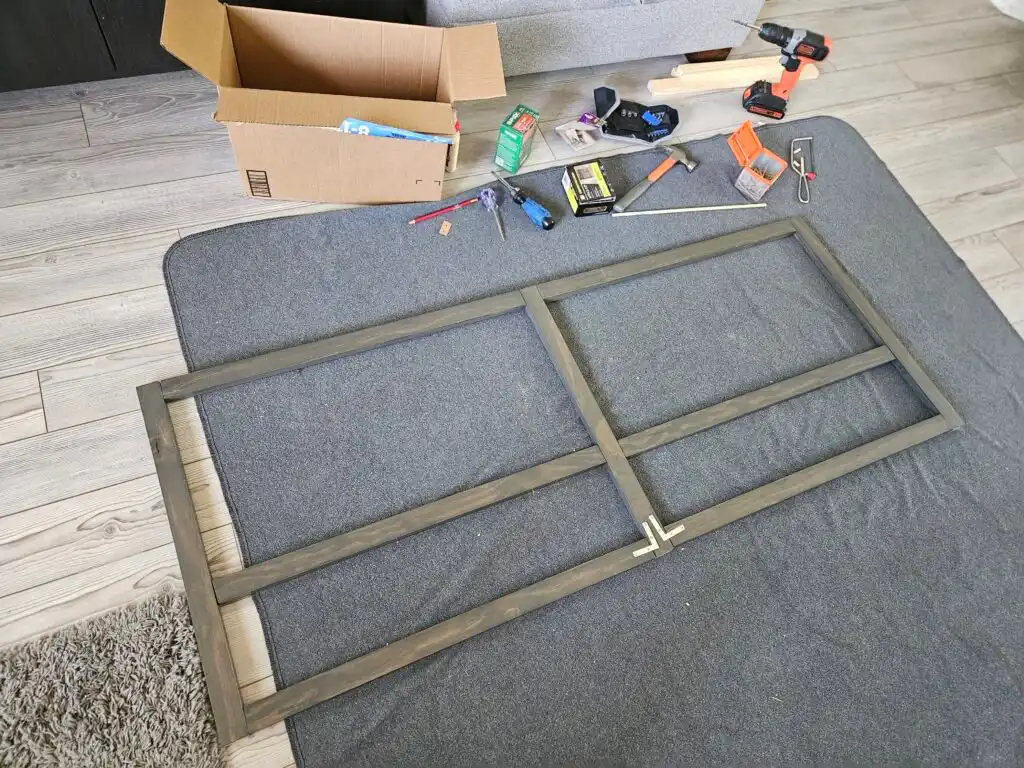

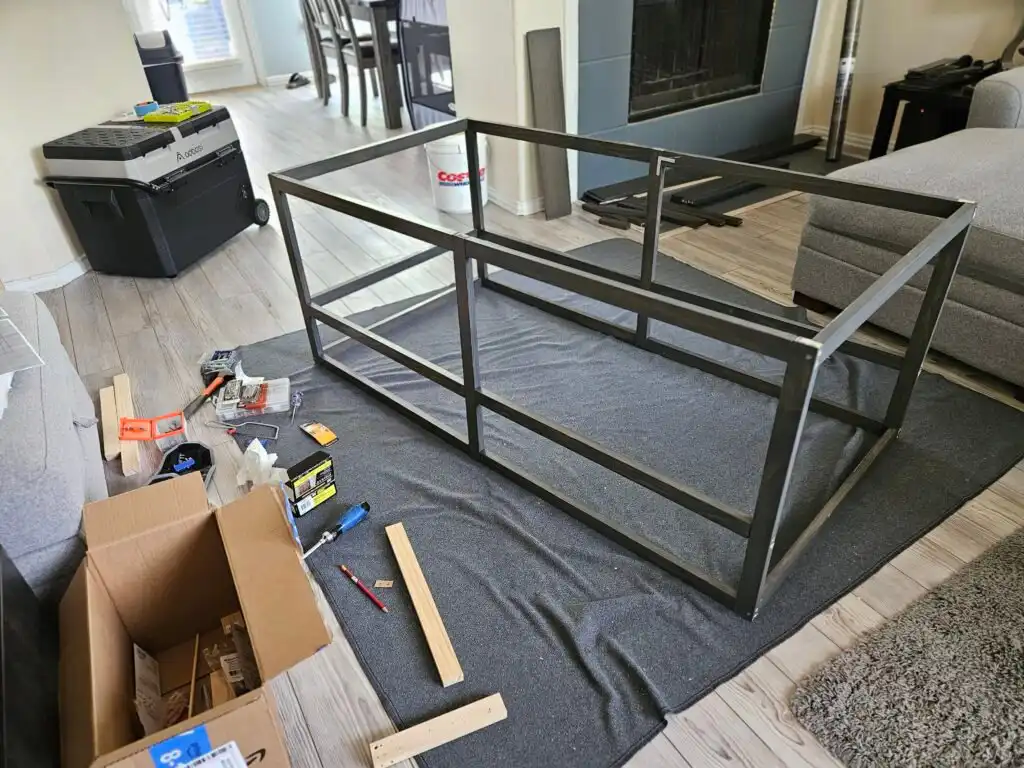

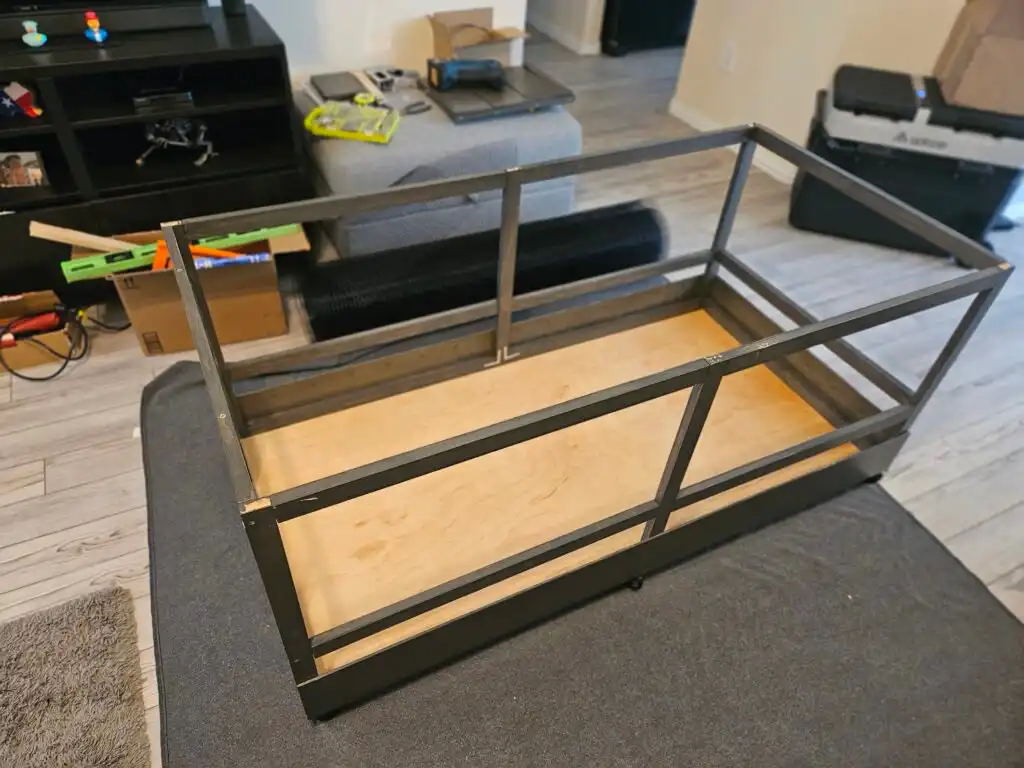
Once the main frame was stable, we attached the bottom plate made of 1/2-inch maple plywood. This gave the crate its sturdy foundation.
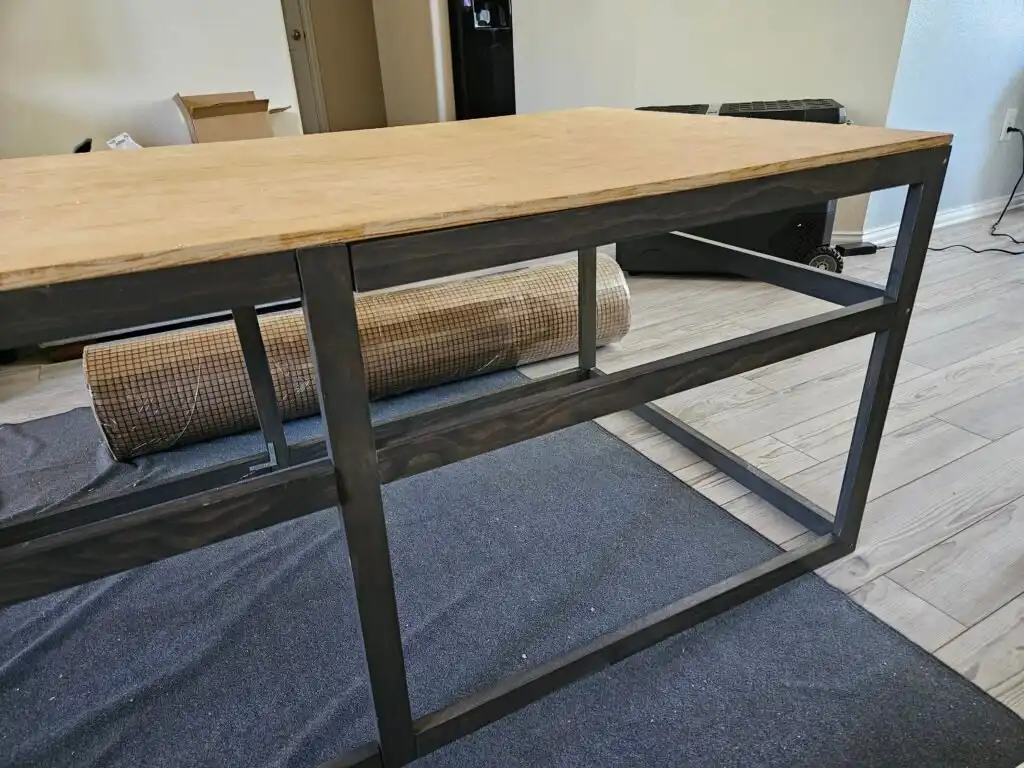
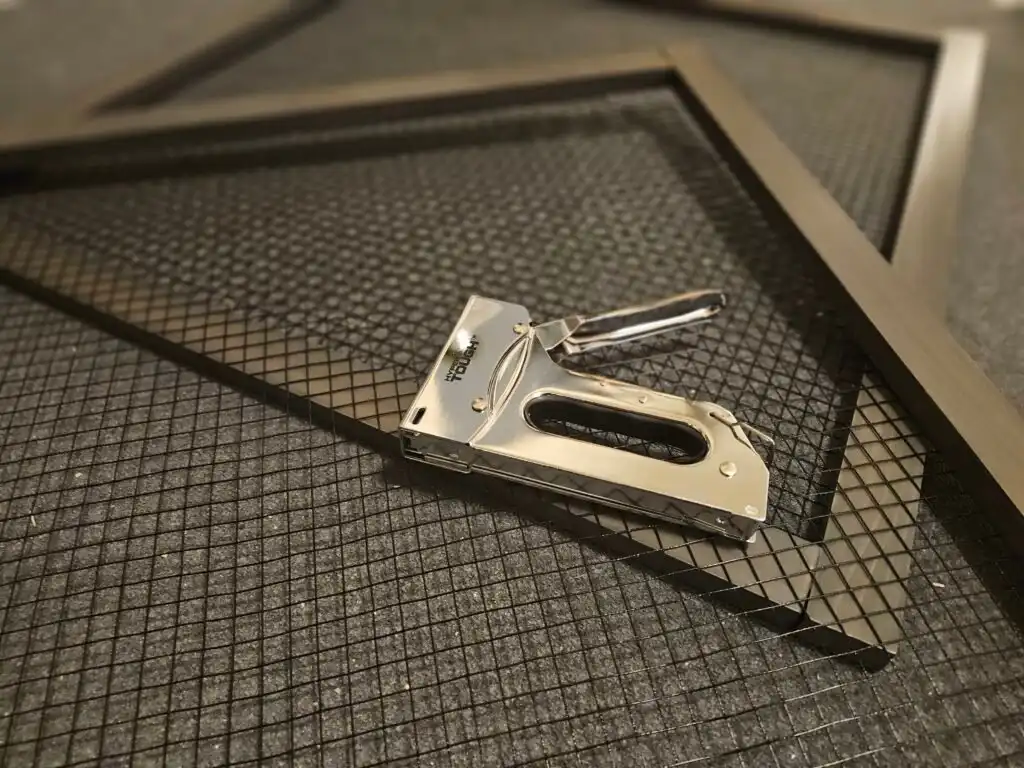
4. Add Ventilation and Flooring
We measured and cut the 1/2-inch black polymer-coated hardware cloth to fit the side openings. Attaching it before the trim makes the final crate look polished and keeps sharp edges hidden.

For the floor, we added a layer of sheet vinyl on top of the plywood base. This step is what makes cleaning so easy. The vinyl creates a waterproof barrier—liquid, food, or bedding messes can be wiped away in minutes.
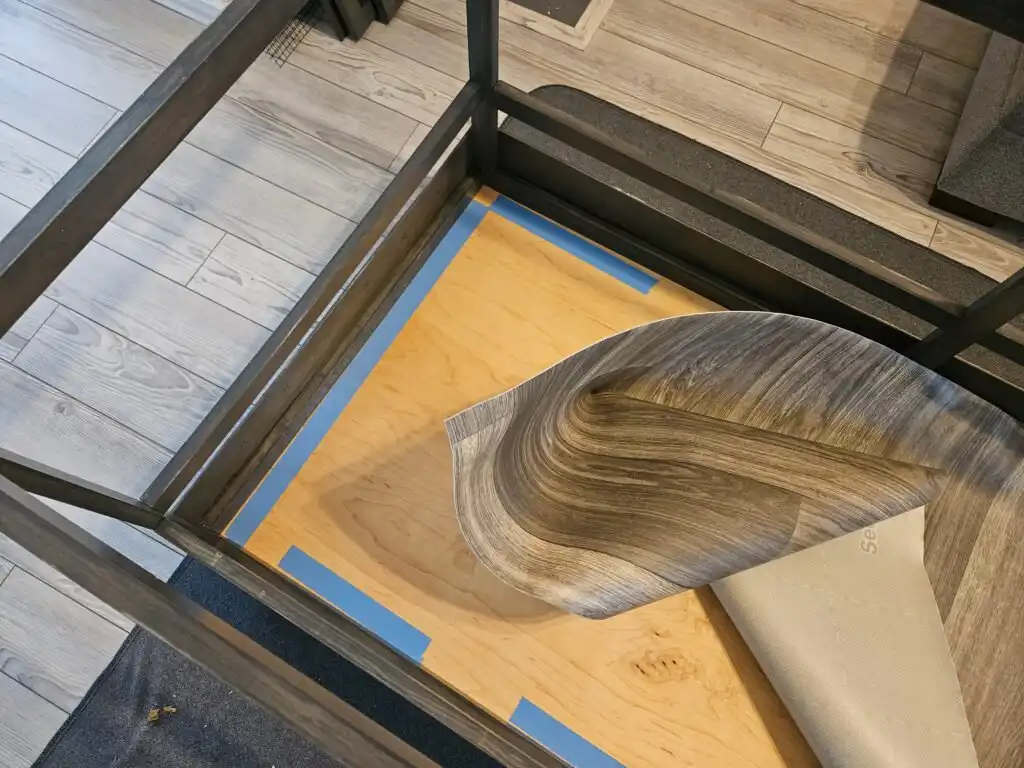
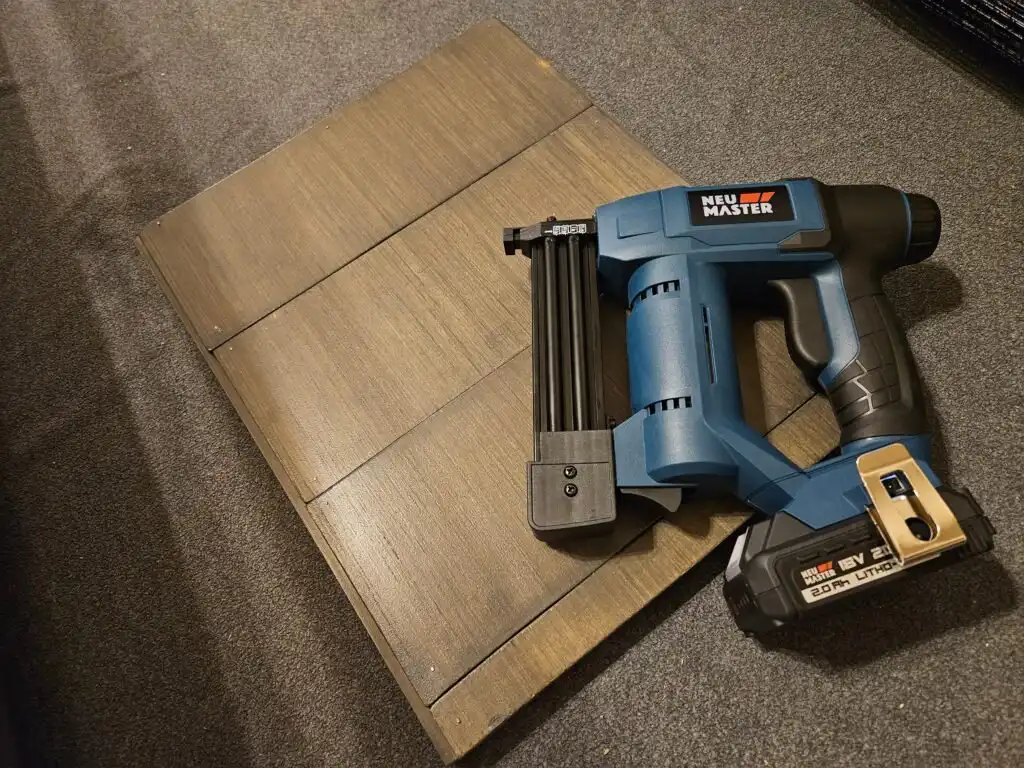
5. Attach the Trim and Outer Panels
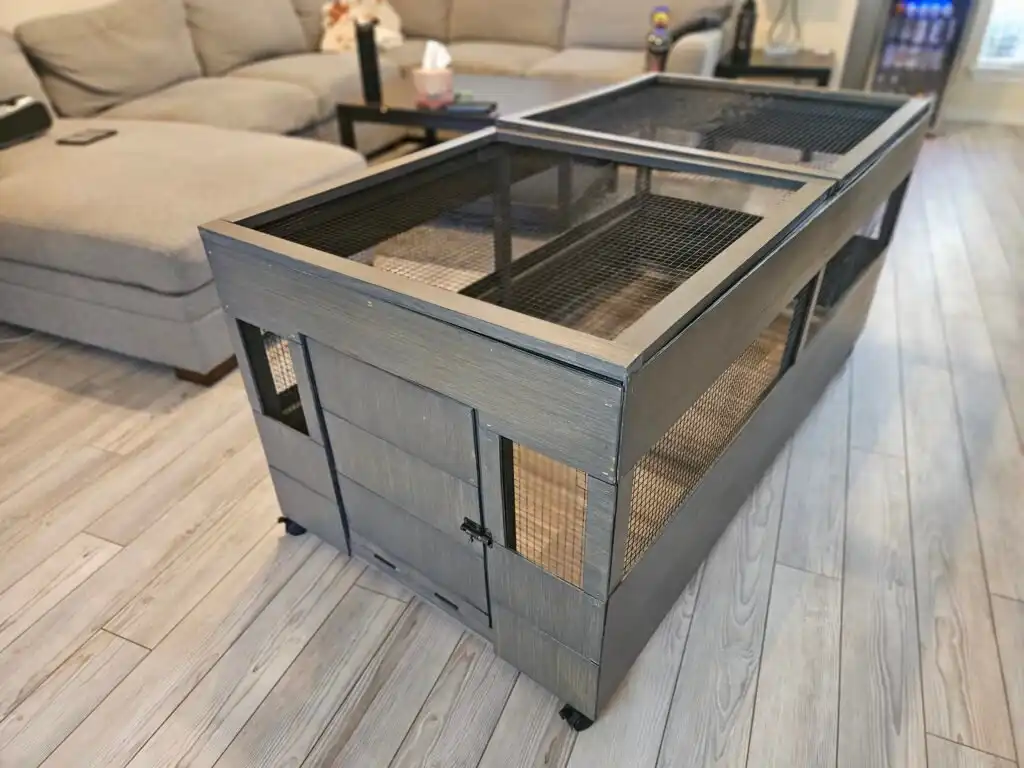
Next came the panels that give the crate its “furniture look.” We used 1/4-inch sanded plywood underlayment for the outer walls and trim pieces, attaching them with a nail gun. This step really transformed the crate from a raw frame into something that looks like part of the living room.
We carefully lined up each panel before nailing it down to keep everything square and neat. Once attached, the hardware cloth edges were hidden behind the trim, leaving smooth, finished surfaces inside and out.
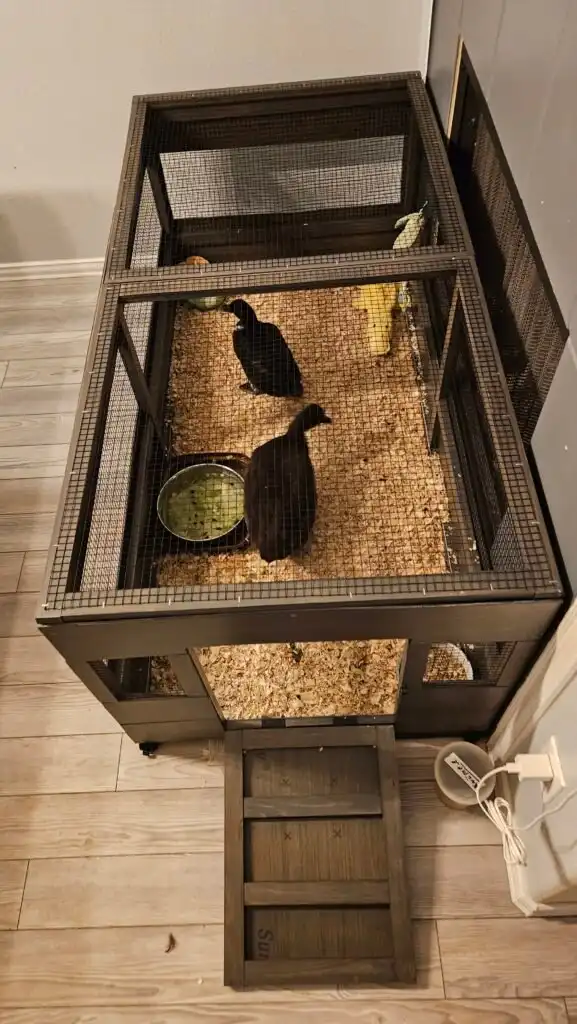
6. Install the Ramp Door and Hinges
For the entrance, we designed a small ramp door. Ducks love having a gentle incline instead of stepping over a high lip. We cut a plywood panel, added hinges, and mounted it so that it could swing down to form a ramp when open.
We made sure the ramp was sturdy enough to handle nightly use but lightweight enough to open and close easily. A simple latch keeps it closed at night.
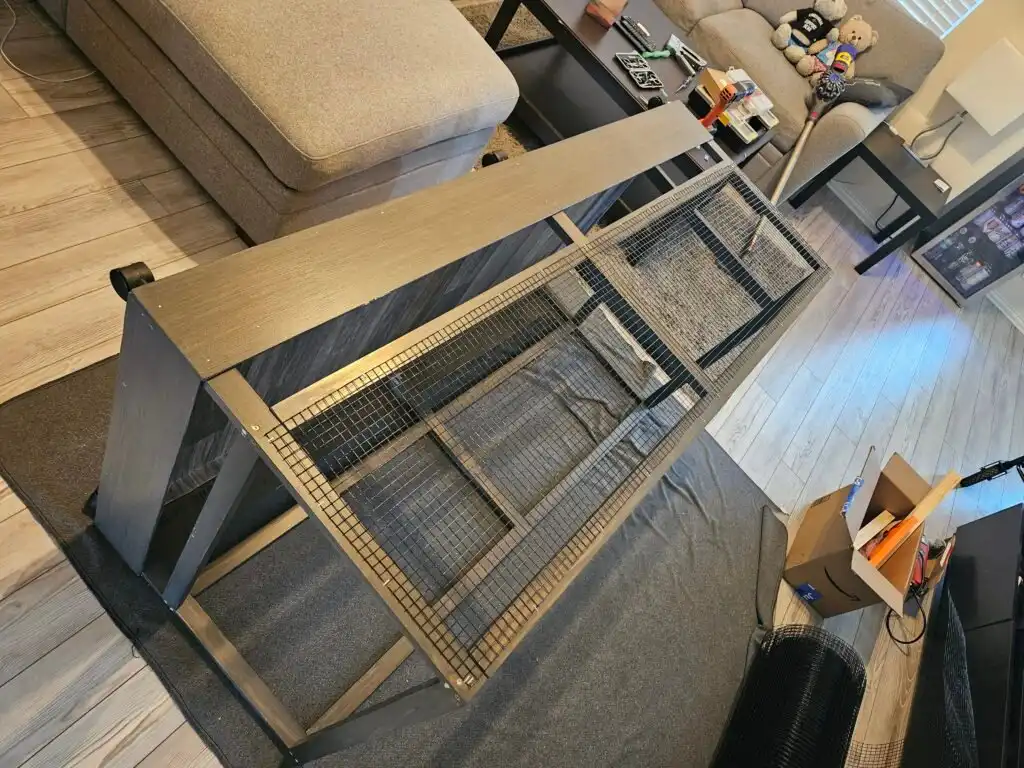
7. Build the Removable Top
The top is made of two lightweight frames, each fitted with hardware cloth. Instead of screwing them down permanently, we designed them to lift off. This makes cleaning and reaching the ducks so much easier.
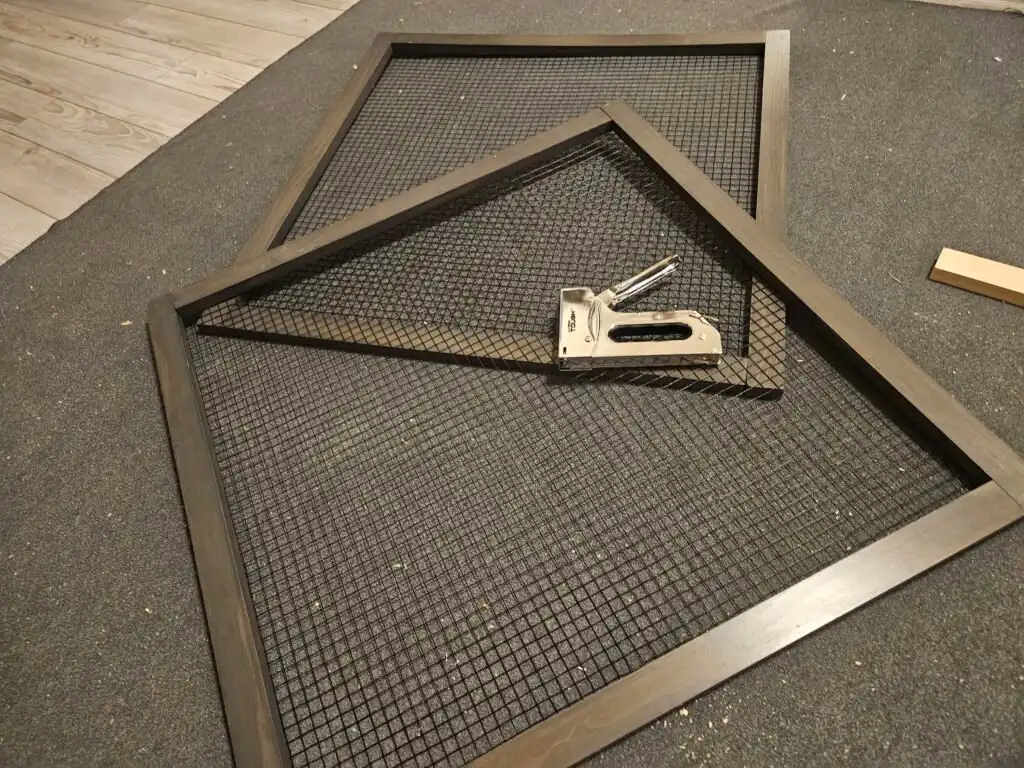
The two-frame design also means you don’t have to remove the entire lid at once—you can just lift one side when you need quick access.
8. Finishing Touches
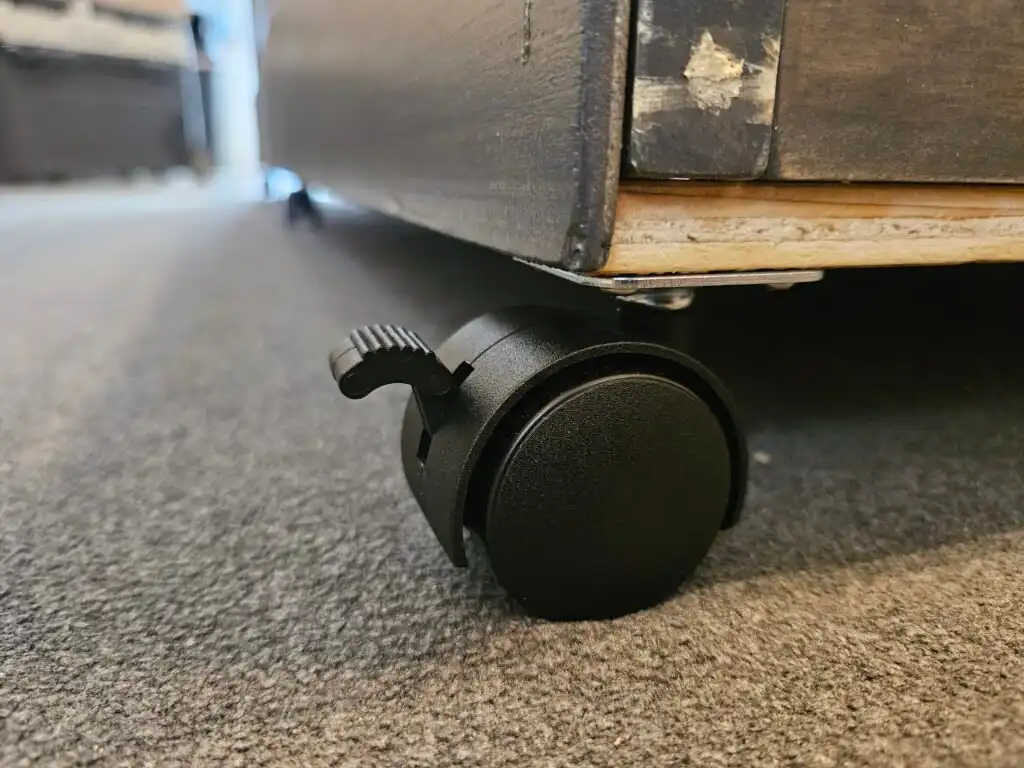
Finally, we added caster wheels to the bottom. With the crate’s size and weight, wheels make it simple to move around when cleaning the room or rearranging furniture.
We double-checked every edge to make sure nothing sharp was exposed. Safety is as important as style—especially when curious ducks are involved.
Making It a Home
Once the build was finished, it was time to turn the crate into Muffin and Krümel’s cozy night home. We lined the floor with pine shavings for soft, absorbent bedding. This gives them a comfortable surface to settle on and helps keep moisture down overnight.
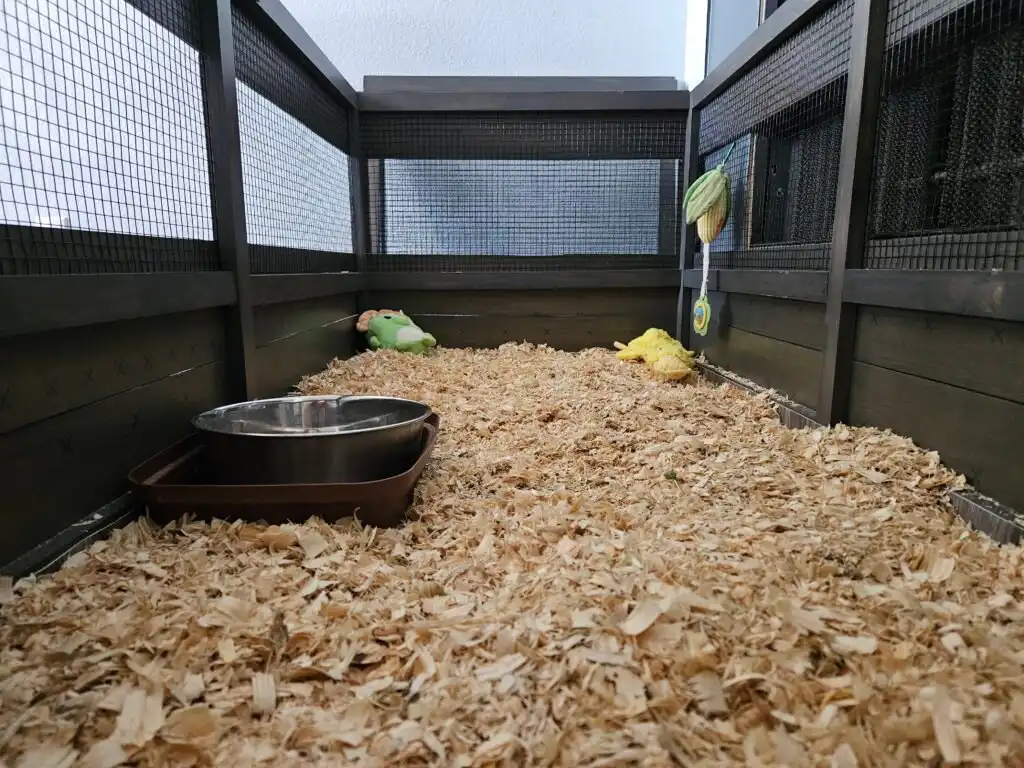
We also added a few duck-safe toys to keep them entertained, along with their food bowl and a water bowl. Yes, our ducks have water available 24/7, even inside their crate. While this does mean extra cleaning for us, it’s important for their well-being. Ducks need water not only for drinking but also to help them swallow food properly and keep their bills clean. For us, the extra work is worth it.
Cleaning and Maintenance
A beautiful crate is only practical if it’s easy to maintain, and that was one of our top priorities in the design. Thanks to the vinyl flooring and removable top panels, cleaning is simple.
- Daily care: We spot-clean the bedding each morning and replace the water bowl with fresh water. Food bowls are washed and refilled as needed.
- Deeper cleaning: When needed, we remove the top panels for full access. This makes it easy to change out all the bedding, wipe down the vinyl floor, and freshen up the space completely.
- Durability: The multiple coats of polyurethane on the wood make wiping down any mess quick and effective, preventing moisture from seeping into the wood.
This routine keeps Muffin and Krümel’s crate hygienic, odor-free, and safe, while still blending seamlessly into our home environment.
Why This Works for Ducks
Unlike dog crates, this design prevents bedding from spilling, offers more airflow, and keeps everything duck-safe. The vinyl floor and removable top make cleaning simple, while the furniture-style panels let the crate fit into the home without looking out of place. Muffin and Krümel have plenty of space, and we can keep an eye on them through the mesh sides.
At night, they settle in comfortably, and in the morning, the ramp door makes it easy for them to step out and start their day.
Final Thoughts
This furniture crate has become a cozy, practical solution for our two ducks. It looks good in the house, is easy to maintain, and, most importantly, keeps Muffin and Krümel safe and happy overnight.
If you’re considering building one yourself, take your time with planning and sealing the wood. Ducks are messy, so the extra effort with stain, polyurethane, and vinyl flooring pays off in the long run.
Further Reading & Resources
- Building a Hoop Coop for Ducks with Cattle Panels
- Super Easy DIY Duck House
- Super Cute DIY Duck House (Step-By-Step-Guide)
- Indoor Pet Ducks: Tips for a Happy, Healthy House Duck
- DIY Duck Diapers: Keeping Your Duck Comfortable and Your House Clean
Is your habitat optimized for safety? Return to the Habitat Guide for more research on predator-proofing and sanctuary design.