DIY Easter Decorations: Painting Duck Eggs
Last updated: February 28th, 2026
To keep our research-backed guides free, this site uses ads and affiliate links (earning a small commission at no cost to you). Everything here is created by a duck mom and PhD scientist, combining academic rigor with hands-on experience to provide practical, trustworthy advice for duck keepers everywhere. 🦆 Learn more
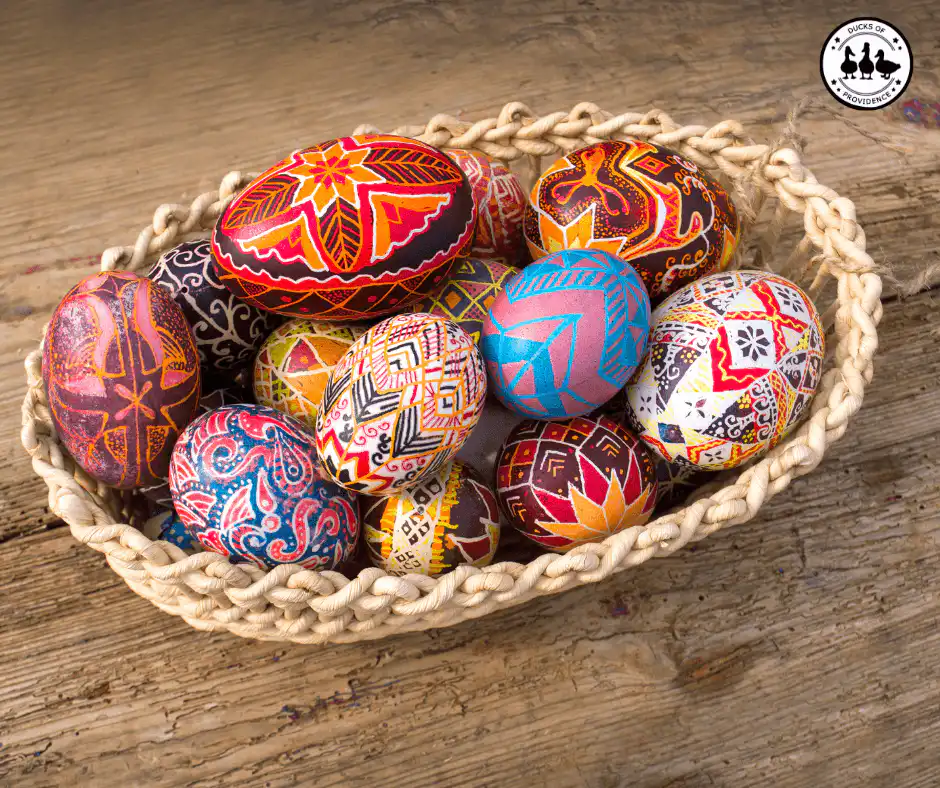
Painting duck eggs is a fantastic way to get creative this Easter! Their larger size and smooth surface make them ideal for intricate designs, while their natural sheen adds an elegant touch to any holiday display. Whether you’re decorating for a festive centerpiece or crafting unique gifts, duck eggs offer a perfect canvas for artistic expression. Plus, they’re incredibly versatile for various craft projects beyond painting. Let’s explore how you can transform these eggs into stunning, handmade Easter treasures!
Ducks of Providence is free, thanks to reader support! Ads and affiliate links help us cover costs—if you shop through our links, we may earn a small commission at no extra cost to you. Thanks for helping keep our content free and our ducks happy! 🦆 Learn more
Part of the Community & Behavior Hub, Exploring the social complexity and psychological needs of domestic ducks.
Quick Navigation: Jump to a Section
[hide]
Why Choose Duck Eggs for Crafting?
Duck eggs offer a variety of benefits that make them stand out from the typical chicken egg when it comes to crafting:
- Size and Texture: Duck eggs are larger than chicken eggs, giving you more space to work with for your designs. They also have a smooth surface that makes them easier to paint and decorate.
- Durability: Duck eggs are thicker and stronger than chicken eggs, so they’re less likely to crack while you’re decorating. This makes them perfect for long-lasting Easter decorations.
- Unique Appeal: Duck eggs often have a slightly different hue than chicken eggs, with a natural off-white or blue tint. This gives your crafts a more distinctive, handmade look that will stand out in your Easter decor.
What You’ll Need
Before you start your creative process, gather the following materials:
- Duck eggs (fresh or blown-out eggs)
- Non-toxic paint (acrylics or craft paint work well)
- Brushes (small fine-tipped brushes for detailing)
- Decorative accessories (glitter, ribbons, small stickers, etc.)
- Egg dye (if you prefer a colorful base before painting)
- Paint pens or markers (for fine detailing)
- Sealer (to protect your painting)
- Protective covering for your work area (newspaper, plastic tablecloth)
- A bowl of water and paper towels (for cleaning brushes and wiping excess paint)
Step-by-Step Instructions for Painting Duck Eggs
1. Prepare the Egg
First, decide whether you want to use fresh duck eggs or blown-out eggs for painting. Fresh eggs can be decorated but must be handled carefully, while blown-out eggs are lighter, more delicate, and will last much longer as decorations.
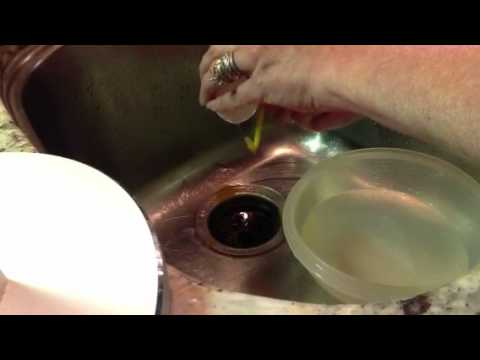
To blow out a duck egg, start by carefully making small holes at both ends of the shell with a pin or needle. Gently enlarge one hole slightly to make it easier to remove the contents. Hold the egg over a bowl and blow through one hole, allowing the yolk and white to flow out. Use a thin skewer or needle to break up the yolk inside, making it easier to remove.
Once emptied, rinse the eggshell thoroughly with warm water and a bit of mild soap. Let the eggs dry completely before painting to ensure a smooth surface for decorating. If you want extra durability, consider reinforcing the shell by brushing a thin layer of Mod Podge or clear glue over the surface.
2. Set Up Your Workspace
Before you begin painting duck eggs, take a few moments to prepare your workspace. Cover your table with newspaper, a plastic tablecloth, or parchment paper to protect it from paint spills and stains. If you’re working with children, consider using a tray to contain any mess.
Arrange all your materials within easy reach to keep the process smooth and enjoyable. Gather your paints, brushes, water cups for rinsing, paper towels for dabbing excess paint, and a drying rack or egg carton to hold the eggs as they dry. If you’re using dye, have a bowl of vinegar on hand to help the color adhere better.
Good lighting is also important, especially for intricate designs. If possible, work near a window with natural light or use a bright lamp to clearly see details as you paint. With everything set up, you’re ready to start creating beautiful, hand-painted duck eggs!
3. Base Coating
Before adding intricate designs, start with a smooth base coat to create an even background for your artwork. Using a larger, soft-bristled paintbrush or a sponge brush, apply a thin, even layer of acrylic or watercolor paint to the entire surface of the duck egg. If you’re using dye instead, submerge the egg in a bowl of colored dye for a few minutes, rotating it gently to ensure full coverage.
Soft pastel shades like light pink, pale lavender, mint green, and baby blue are traditional Easter colors, but feel free to get creative with bold or metallic hues for a more unique look. If you want a more opaque and vibrant base, apply a second coat once the first layer has dried completely.
To speed up the drying process, place the eggs in an empty egg carton or use a drying rack. If you’re working with blown-out eggs, inserting a skewer or toothpick into one hole and propping it up can help keep your hands clean and prevent smudging. Once the base coat is fully dry, you’re ready to move on to the fun details!
4. Add Detailed Designs
Now that your base coat is completely dry, it’s time to bring your duck eggs to life with intricate designs! Using fine-tip paintbrushes, toothpicks, or paint pens, start adding decorative elements such as polka dots, stripes, florals, or Easter-themed images like bunnies, chicks, and eggs. If you prefer a more modern aesthetic, geometric patterns or abstract designs can create a stylish, contemporary look.
For added elegance, try incorporating metallic paints like gold, silver, or rose gold for beautiful accents. You can use them to highlight details, create shimmering borders, or add a touch of sparkle to your designs. White paint or fine-tip markers can be used for delicate lace-like patterns, while bold colors can create striking contrasts.
If you want more precision, consider using stencils or washi tape to guide your designs and ensure clean, crisp lines. Dipping a cotton swab or the end of a paintbrush in paint is an easy way to create uniform polka dots, while a thin brush or toothpick works well for fine details.
May 22, 2026 7:59 PM


For extra dimension, try layering colors by allowing one design element to dry before adding another. You can also experiment with watercolor effects by lightly diluting paint with water for a soft, blended look. No matter your artistic style, this is your chance to personalize each egg and make it truly unique!
5. Decorative Embellishments
Take your painted duck eggs to the next level by adding decorative embellishments for extra texture and sparkle! A little creativity can transform your eggs into stunning Easter keepsakes.
Add Sparkle and Shine
For a touch of glamour, apply a thin layer of glue to certain areas of the egg and sprinkle fine glitter over it. Gold, silver, or pastel-colored glitter can make your designs pop. You can also use metallic foil flakes or shimmer powders to create an elegant, gilded effect.
Embellish with Ribbons and Lace
If you love a classic or vintage look, wrap your eggs with delicate lace, thin ribbon, or decorative twine. Simply secure them with a small dab of glue or tie a tiny bow for a charming, rustic touch. Satin or organza ribbons in soft pastel shades complement traditional Easter colors beautifully.
Use Beads, Pearls, and Sequins
For a more intricate and textured design, glue small beads, pearls, or sequins onto your eggs. These embellishments can be used to create patterns, floral designs, or even monograms. Flat-back pearls or rhinestones add an elegant, polished look, while tiny seed beads can give a whimsical, boho feel.
Try Pressed Flowers or Decoupage
If you want a more artistic and natural feel, use pressed flowers or decorative paper cutouts. Carefully arrange and glue pressed flowers onto the egg for a botanical, cottagecore aesthetic. Alternatively, you can decoupage with patterned tissue paper, napkins, or vintage book pages for a unique, textured effect.
Experiment with Stickers and Temporary Tattoos
For a quick and easy embellishment, use stickers or temporary tattoos. Floral patterns, Easter motifs, or intricate designs can be applied effortlessly and sealed with a layer of clear glue or Mod Podge for durability.
With so many creative options, your decorated duck eggs will be one-of-a-kind masterpieces! Mix and match embellishments to suit your style and make your Easter display truly special.
6. Display and Enjoy
Once your painted duck eggs are completely dry, it’s time to showcase your beautiful creations! There are countless ways to display them, depending on your style and space.
Create a Festive Centerpiece
Arrange your decorated eggs in a decorative bowl or woven basket filled with shredded paper, moss, or pastel-colored Easter grass for a charming centerpiece. Place it on your dining table, coffee table, or entryway for an eye-catching seasonal touch.
Use an Egg Stand or Holder
Display individual eggs using egg cups, small candle holders, or mini pedestals to give each design the attention it deserves. This is a great way to highlight particularly detailed or intricate eggs.
Decorate an Easter Tree
For a unique and festive display, turn your painted duck eggs into hanging ornaments! Attach a small ribbon or string through the holes of blown-out eggs and tie them onto branches, either from real twigs arranged in a vase or on an artificial Easter tree. This makes for a lovely seasonal decoration that can be placed anywhere in your home.
Create a Window or Mantel Display
Line up your decorated eggs along a windowsill or fireplace mantel for a cheerful holiday accent. Pair them with spring flowers, candles, or bunny figurines to enhance the Easter atmosphere.
Make a Shadow Box or Decorative Frame
For a long-lasting keepsake, arrange your most beautifully decorated eggs in a shadow box or behind glass in a deep picture frame. This protects them while allowing you to enjoy your artwork for years to come.
Incorporate Them into a Seasonal Wreath
If you enjoy DIY decor, hot glue your eggs onto a grapevine or foam wreath along with faux flowers, greenery, and a festive ribbon. Hang it on your front door or inside your home for a one-of-a-kind Easter decoration.
No matter how you choose to display them, your painted duck eggs will add a bright and festive touch to your home, making Easter celebrations even more special!
Creative Craft Ideas Using Duck Eggs
If you’re feeling extra creative, there are plenty of ways to extend your duck egg decorating into fun and unique craft projects! Here are some exciting ideas to explore:
1. Eggshell Planters
Once your duck eggs are emptied and decorated, repurpose them into charming mini planters. Their natural shell makes an excellent eco-friendly container for small plants.
How to Make:
- Carefully break off the top of the eggshell to create a small opening.
- Rinse and dry the shell thoroughly.
- Fill the eggshell with a bit of potting soil.
- Add small succulents, tiny flowers, or herbs like basil and thyme.
- Place the planted eggshells in an egg carton or a decorative holder for a rustic spring centerpiece.
These adorable planters make perfect table decorations or gifts and bring a fresh touch of nature to your home!
2. Hanging Egg Ornaments
Turn your beautifully painted duck eggs into hanging decorations that can be displayed on an Easter tree, garland, or even your front door.
How to Make:
- If using blown-out eggs, gently make two small holes at the top and bottom using a needle.
- Thread a piece of ribbon, twine, or fishing line through the holes.
- Tie a knot at the bottom and form a loop at the top for hanging.
- For extra flair, attach beads, bows, or small flowers to the string.
These hanging eggs can be used to decorate Easter baskets, doorknobs, chandeliers, or even spring wreaths!
3. Eggshell Mosaics
For a more advanced craft, turn painted duck eggshells into mosaic art by breaking them into small pieces and arranging them into creative patterns.
How to Make:
- After decorating your eggs, gently crush the shells into small pieces.
- On a piece of canvas, cardstock, or wooden board, sketch out a simple design (flowers, Easter bunnies, geometric patterns, etc.).
- Apply a thin layer of glue over the design.
- Use tweezers or your fingers to place the eggshell pieces onto the glue, forming a colorful mosaic.
- Once the glue dries, seal the artwork with a layer of clear varnish or Mod Podge.
Eggshell mosaics can be framed or used as decorative coasters, greeting cards, or unique wall art.
Tips for Crafting with Duck Eggs
- Handle with Care: Duck eggs are sturdier than chicken eggs but still delicate. Be gentle when painting or handling them to avoid cracking the shell.
- Seal Your Designs: If you want to preserve your designs for years to come, apply a clear acrylic spray or brush-on sealant to protect your painted eggs from fading or chipping.
- Experiment with Techniques: Try different painting techniques, such as watercolor washes for a soft look or decoupage for a textured, layered effect. The key is to have fun with it!
Conclusion
Painting and crafting with duck eggs is a wonderful way to add a personal touch to your Easter decorations. Not only are duck eggs perfect for creating beautiful and unique designs, but they also offer a creative outlet that can be enjoyed by crafters of all ages. Whether you’re looking to create colorful ornaments, elegant planters, or intricate mosaics, duck eggs provide endless possibilities for Easter crafts.
So, gather your supplies, get creative, and start crafting! And don’t forget to share your stunning duck egg creations with friends and family, they’re sure to be a hit this Easter season. Happy crafting!
📢 We’d love to see your duck egg masterpieces! Share your creations with us on social media and tag us @ducks_of_providence, or leave a comment below with your favorite design. Need more crafting inspiration?
Connect deeper with your flock. Discover more about duck psychology and social dynamics in the Community & Behavior Hub.