Super Cute DIY Duck House (Step-By-Step-Guide)
Last updated: March 7th, 2026
Having a cozy and safe house for your ducks is essential for their health and happiness. We recently took on the adventure of building our own DIY duck house, and let me tell you, we’re no pros or carpenters! With a little effort and some basic materials, you, too, can construct a comfortable home for your feathered friends. Let’s dive into the step-by-step process of how we did it, so you can build the perfect duck house for your flock.
Ducks of Providence is free, thanks to reader support! Ads and affiliate links help us cover costs—if you shop through our links, we may earn a small commission at no extra cost to you. Thanks for helping keep our content free and our ducks happy! 🦆 Learn more
Part of the Housing & Environment Hub, Engineering safe, bio-appropriate habitats for backyard flocks.
Quick Navigation: Jump to a Section
[hide]
Materials You’ll Need
- Plywood Sheets (for walls, floor, and roof)
- 2×2 Lumber (for framing)
- Hardware Cloth (for ventilation)
- Hinges and Latches (for doors)
- Screws (we prefer wood screws with Torx)
- Non-Toxic Paint or Stain (optional for weatherproofing)
- Vinyl Flooring (for easy cleaning and water resistance)
- Roofing Material (shingles or corrugated plastic)
- Metal Furniture Feet (optional, we used these)
Tools You’ll Need
- Measuring Tape
- Circular Saw or Jigsaw
- Screwdriver and Screws
- Drill
- Stapler Gun
- Paintbrush (if painting or staining)
Step-by-Step Guide
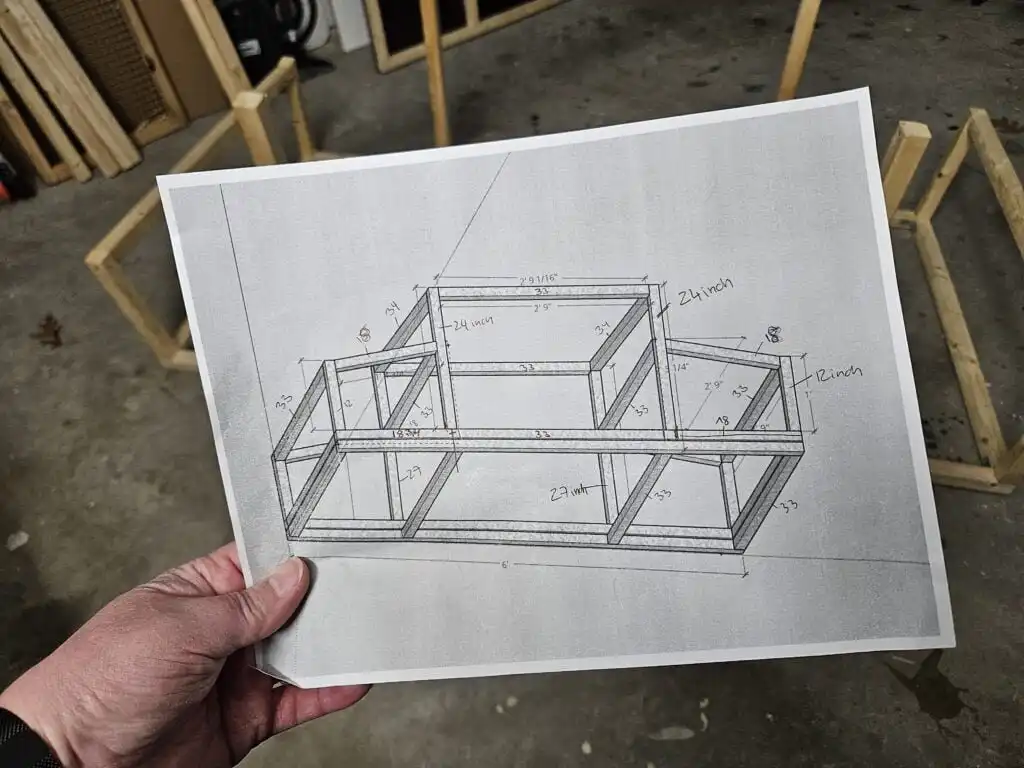
1. Plan Your Duck House Dimensions:
First, decide on the size of your duck house. A good rule of thumb is to provide about 4 square feet of space per duck. For a small flock of 4 ducks, a 4×4-foot house should suffice. Ensure the house is tall enough for your ducks to move around comfortably, around 2-3 feet high.
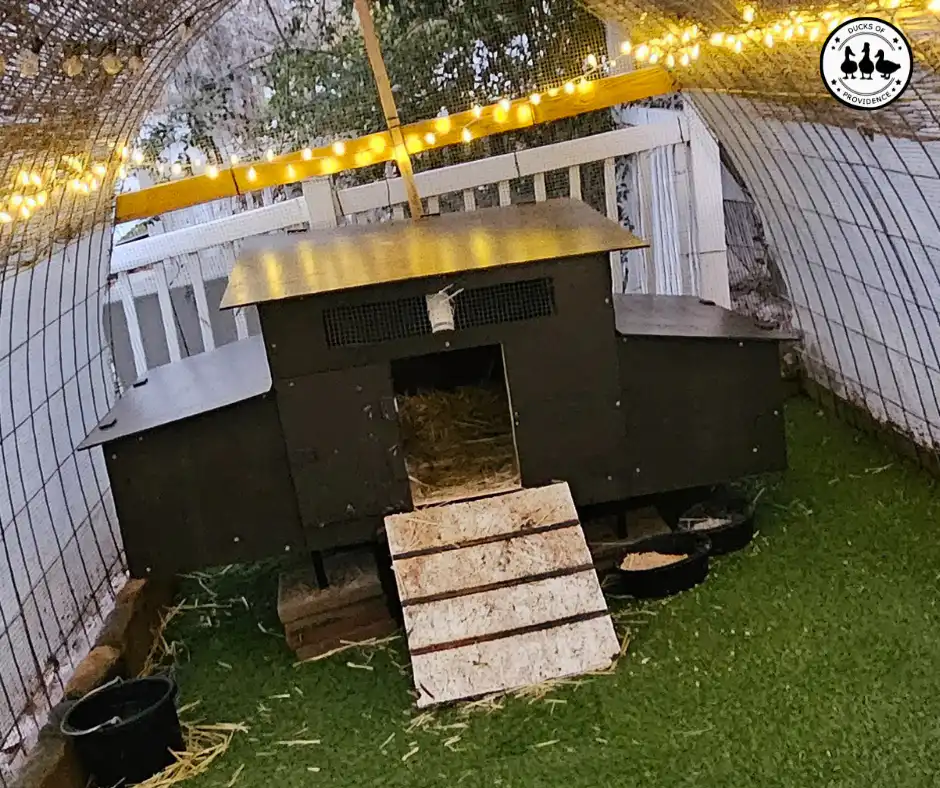
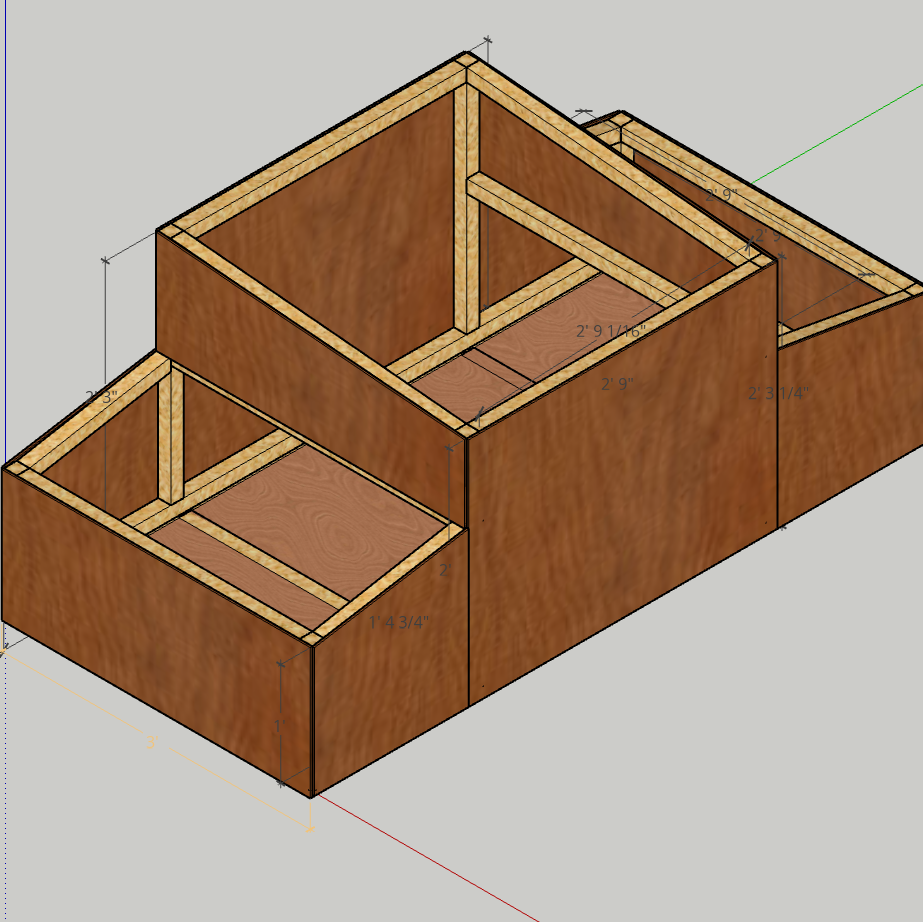
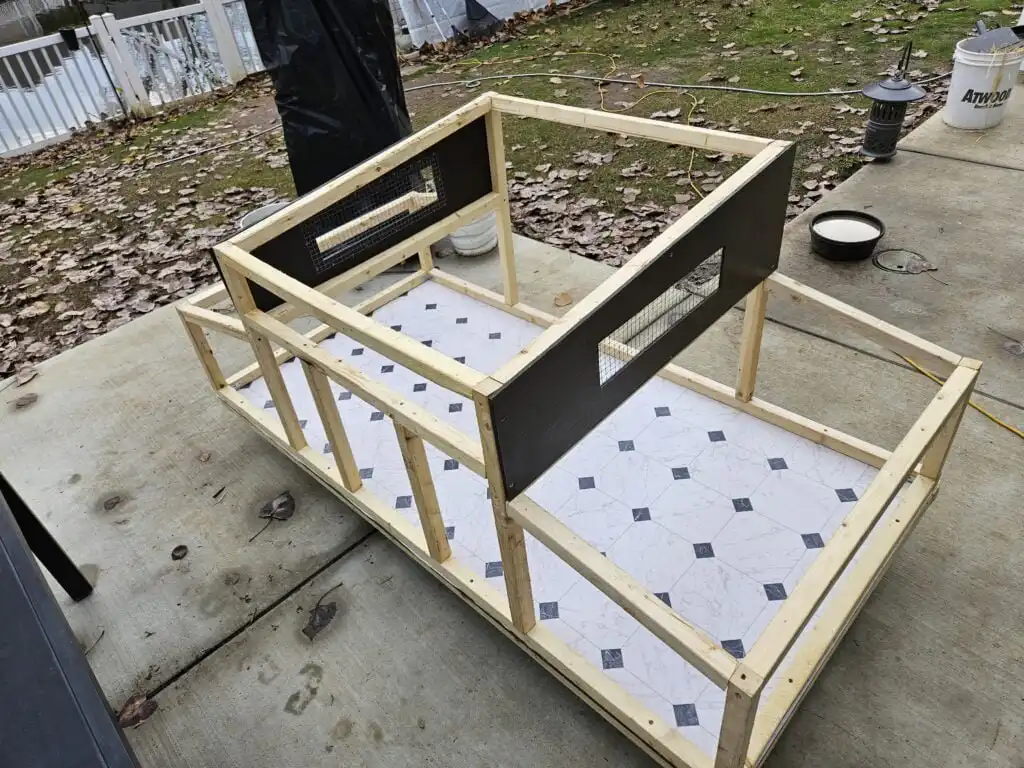
For this house, we have chosen a 3×6-foot base. The center is higher for the ducks to stretch, but the two sides are lower to create cozy nesting areas. Our ducks love to lay their eggs in a place that feels safe and looks super cute.
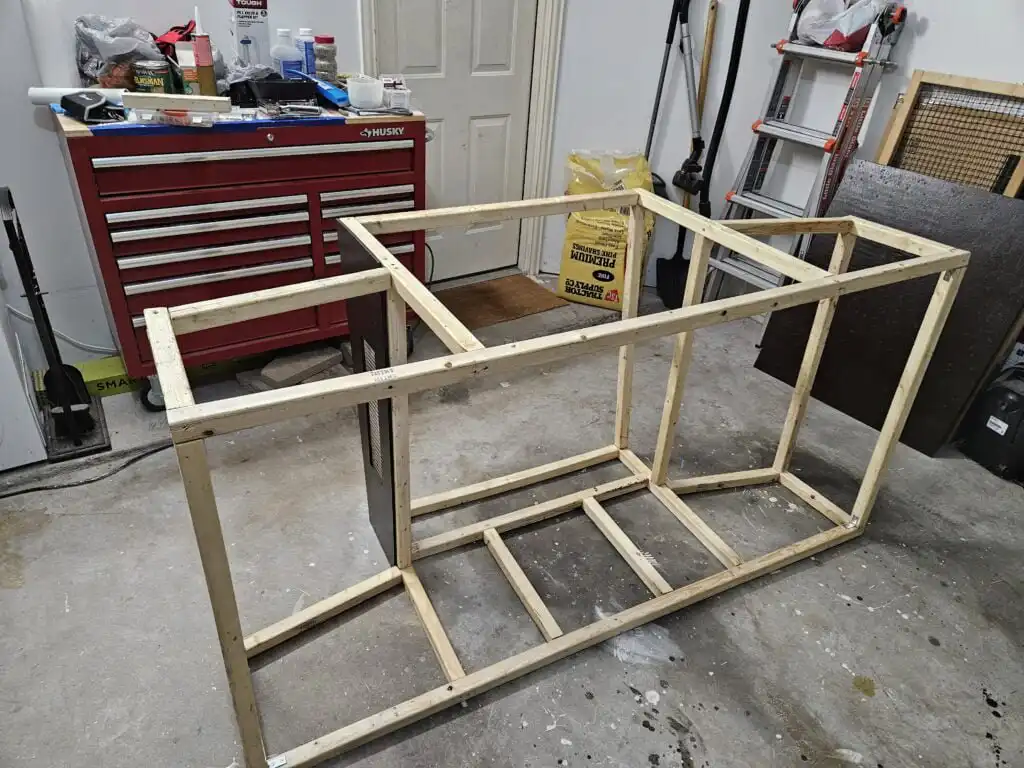
2. Build the Base Frame:
Construct a sturdy base frame using 2×2 lumber. Attach the floor plywood to the frame with screws.
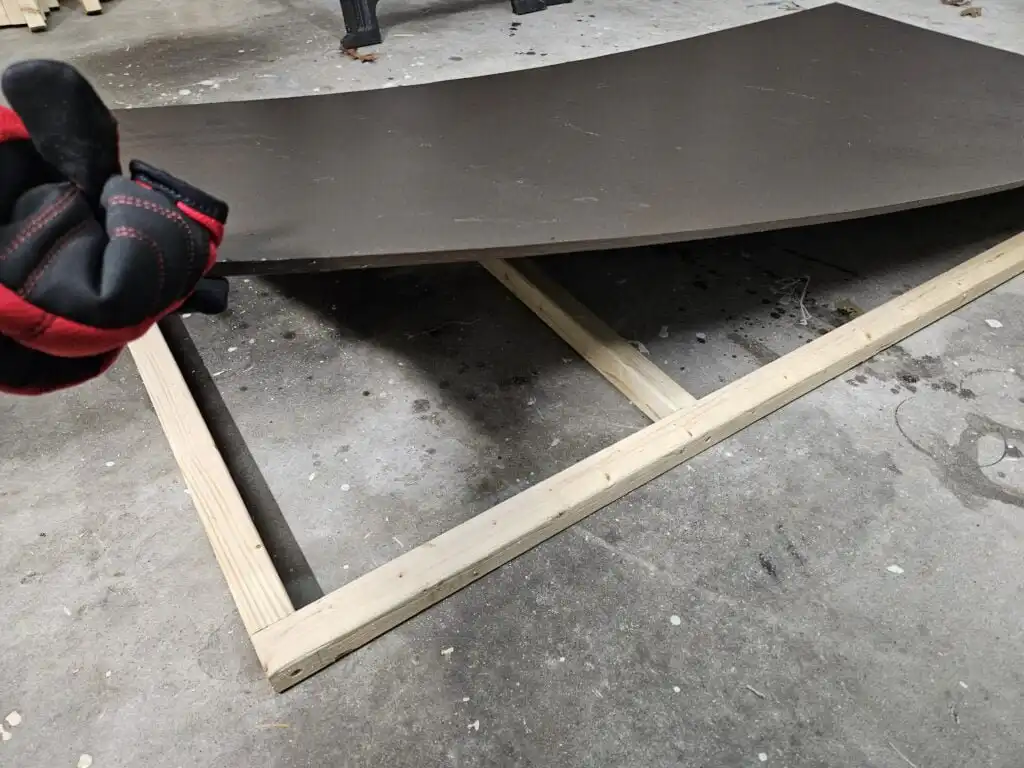
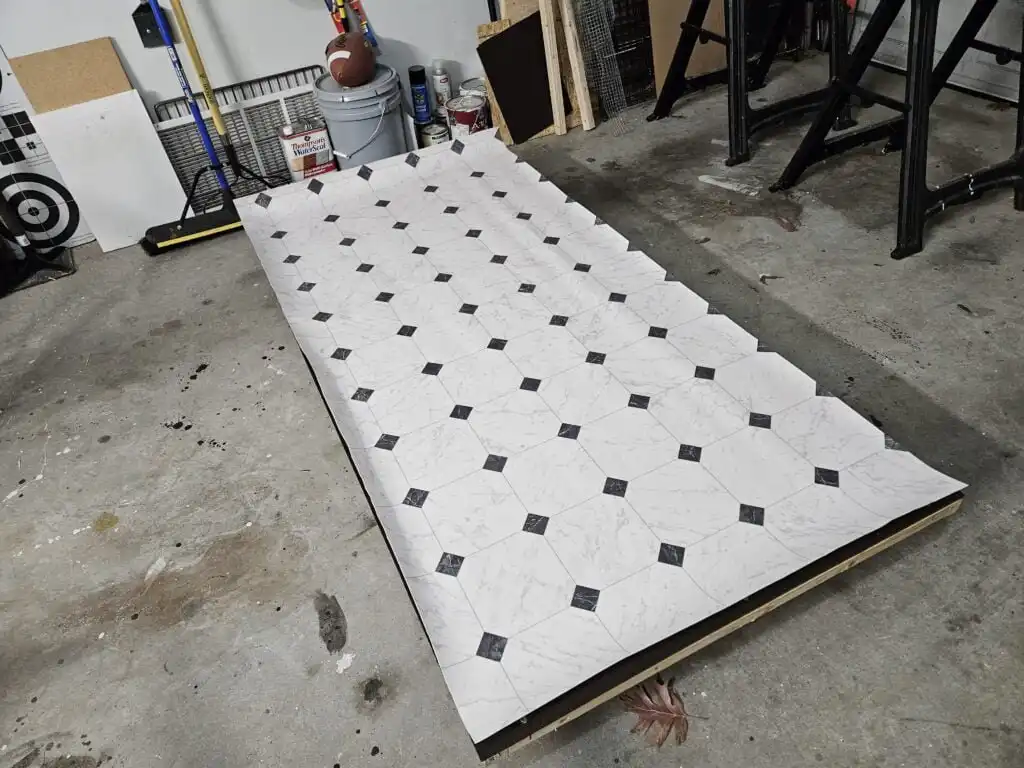
We attached the vinyl to the base before we moved on, but this is optional and can also be added later. We did it this way because we hope that the plywood underneath stays longer, dry, and clean and doesn’t start rotting like our old one.
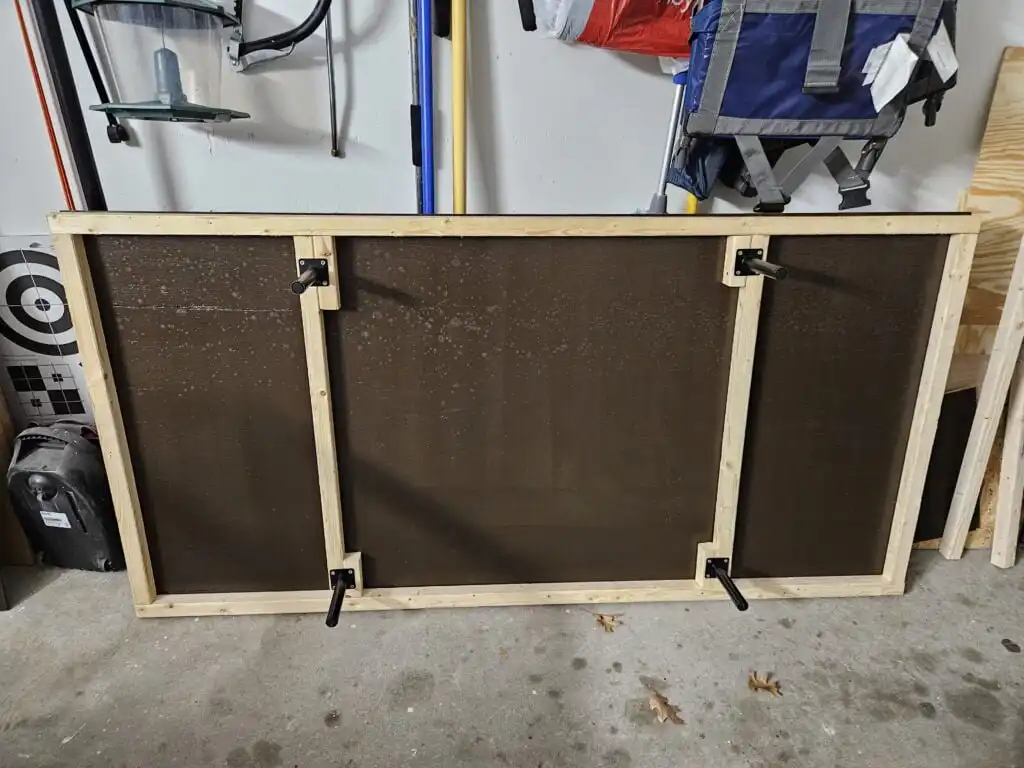
Attach the Metal Legs to the bottom of the base frame. This will elevate the house off the ground, protecting it from moisture and predators.
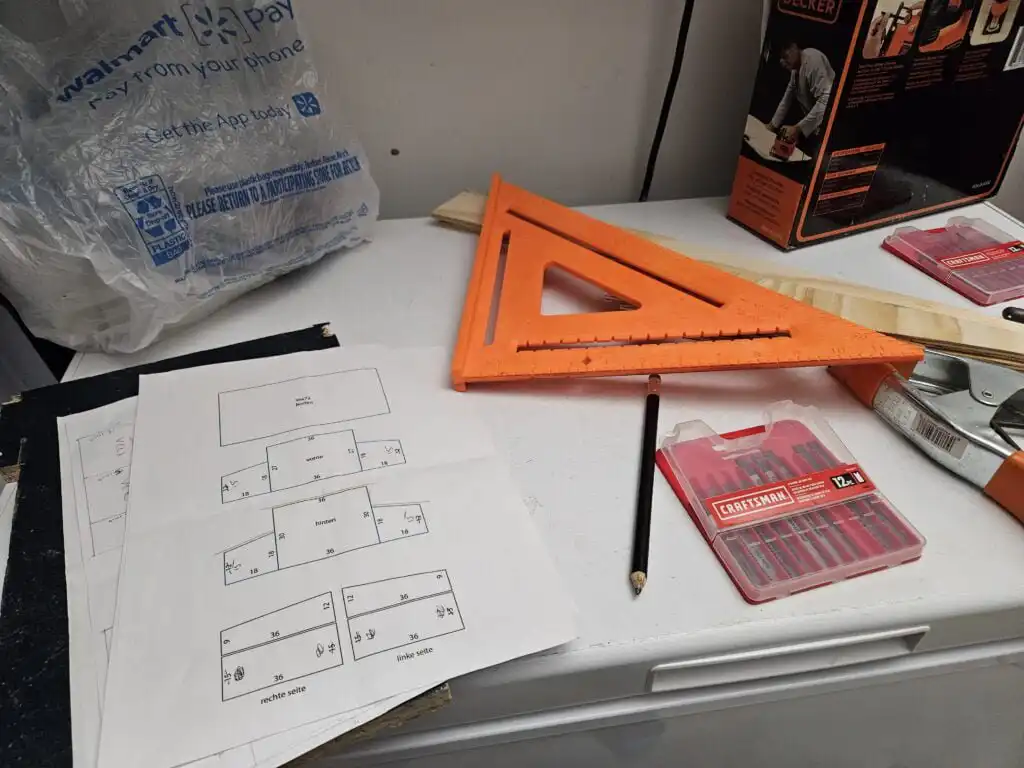
2. Cut the Plywood and the Lumber
Cut the plywood sheets and the lumber to your desired wall dimensions.
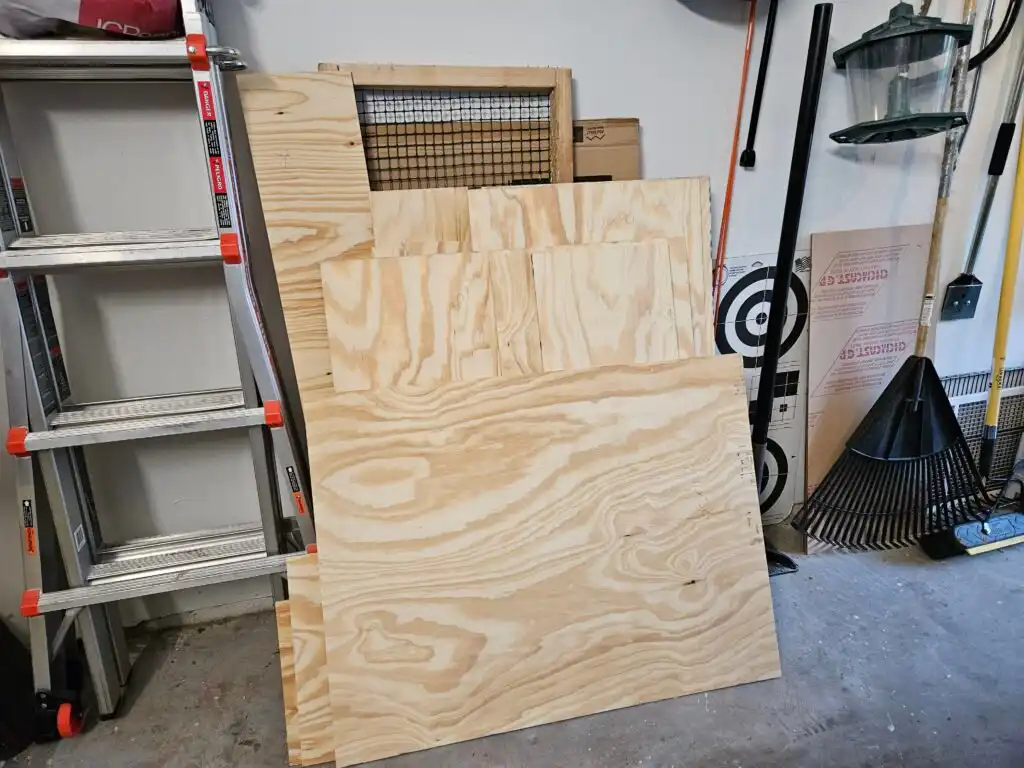
Pro Tip: Get Help with Cutting Plywood. Most hardware stores will cut the plywood to your specified dimensions, making it easier to transport and assemble.
3. Paint or Stain (Optional but Highly Recommended):
If you want to weatherproof your duck house, apply a coat of non-toxic paint or stain. This step is optional but can help extend the life of the wood.
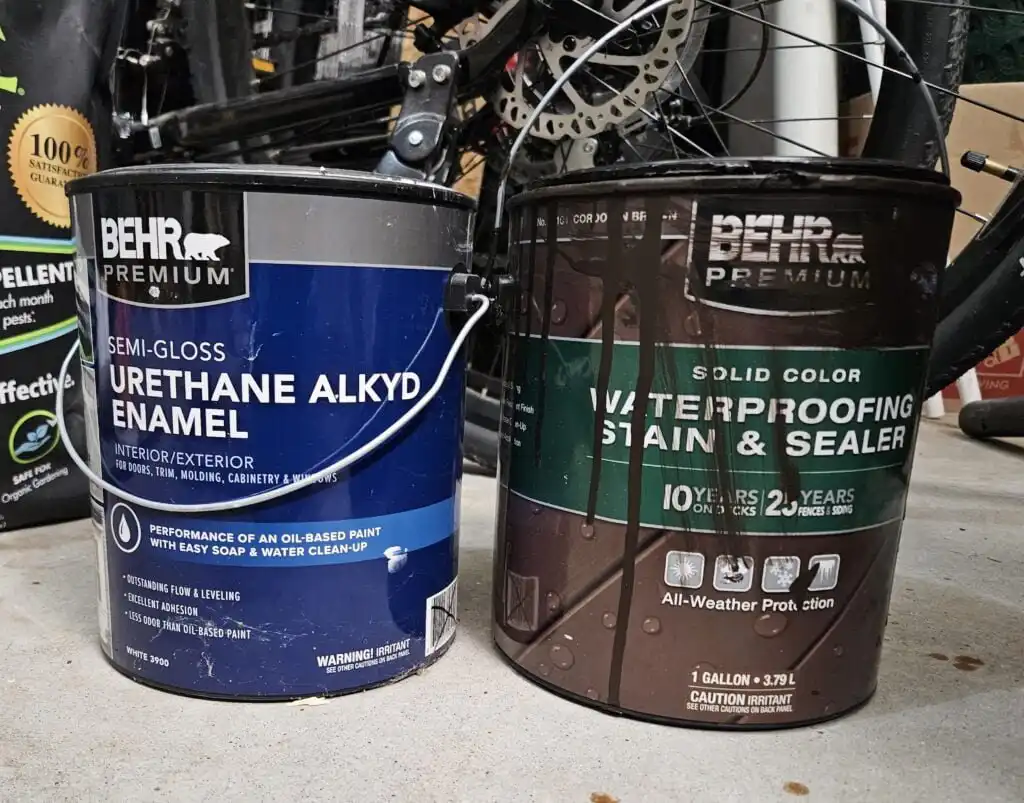
Pro Tip: Buy Paint from the Sale Section. You can often find perfectly good paint at a discount, saving money on your project.
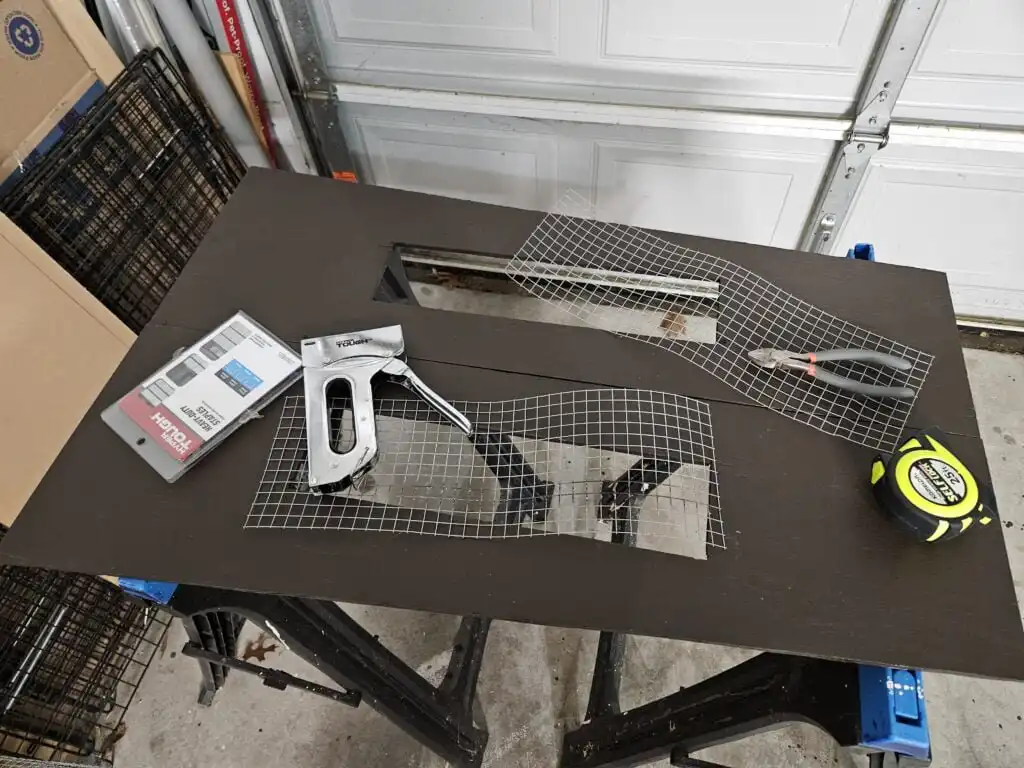
4. Add Ventilation:
Ducks need good ventilation to stay healthy. Cut out windows on opposite sides of the house and cover them with hardware cloth to keep predators out while allowing airflow.
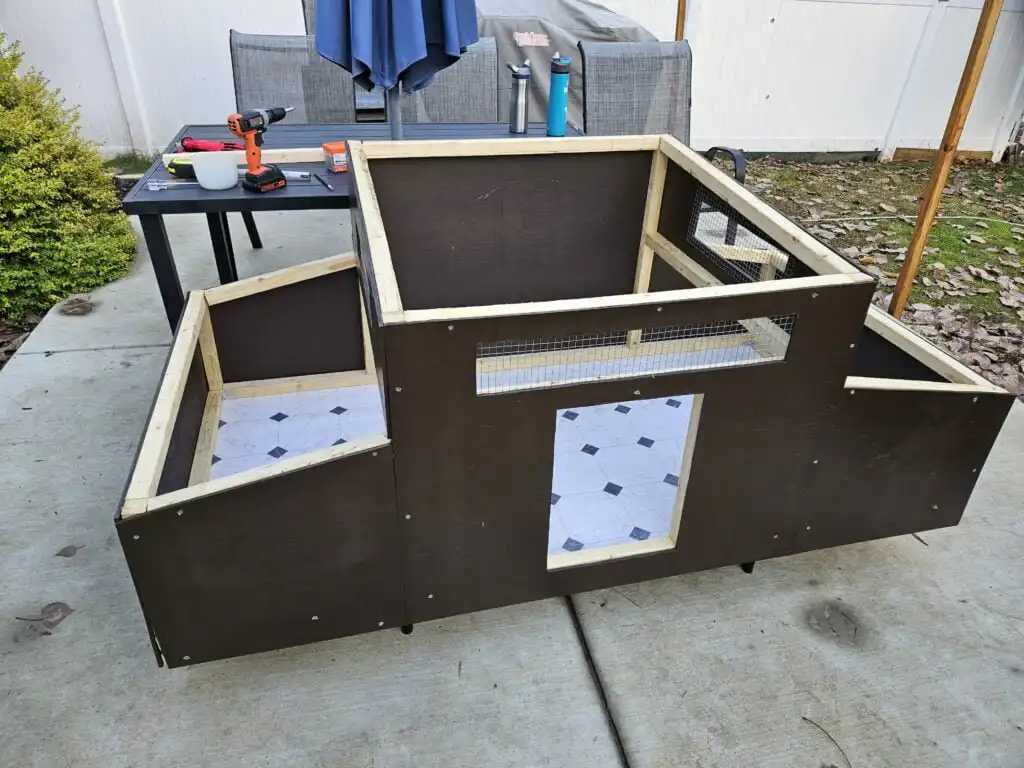
5. Construct the Walls:
Use 2x2s to construct the frame for the walls and to reinforce the corners. This will provide extra support. We used wood torx screws. Be careful to choose the right length.
Attach the plywood walls to the frame, ensuring to leave spaces for the door.
Build two nesting areas on the left and right sides of the house. These areas should be lower than the center part of the house to provide a cozy space for egg-laying.
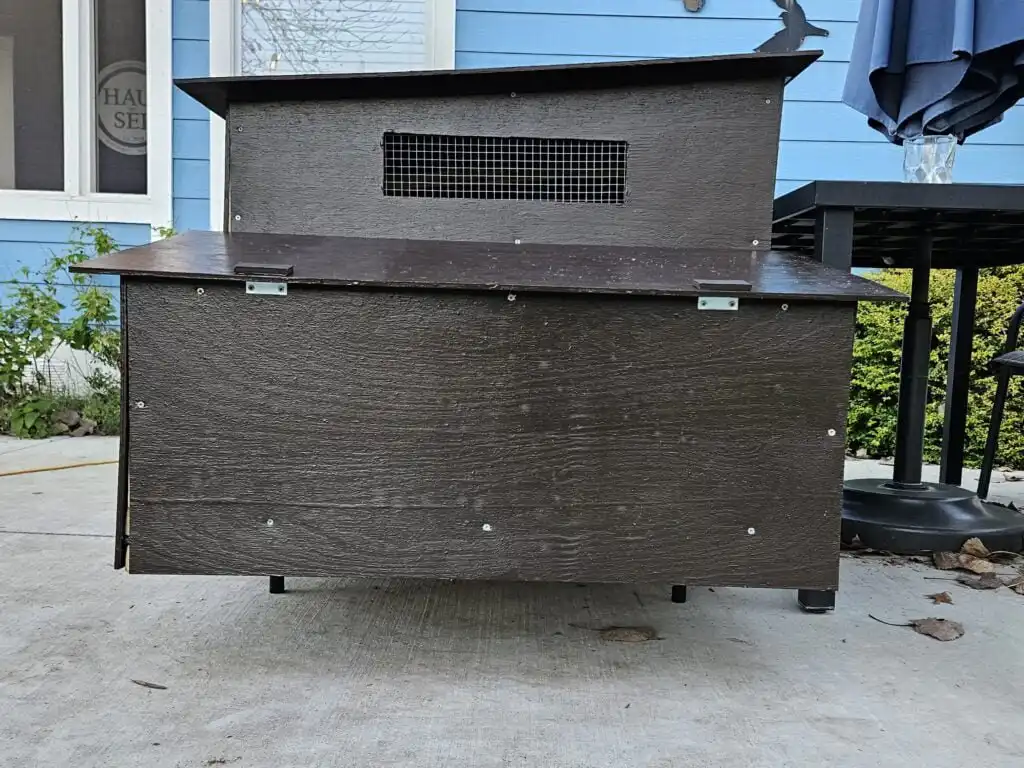
6. Install the Roof:
Cut a plywood sheet for the roof, ensuring it overhangs the walls slightly to prevent rain from getting in. Attach your roofing material to the plywood to make it waterproof. We used waterproof paint. Secure the roof to the house frame.
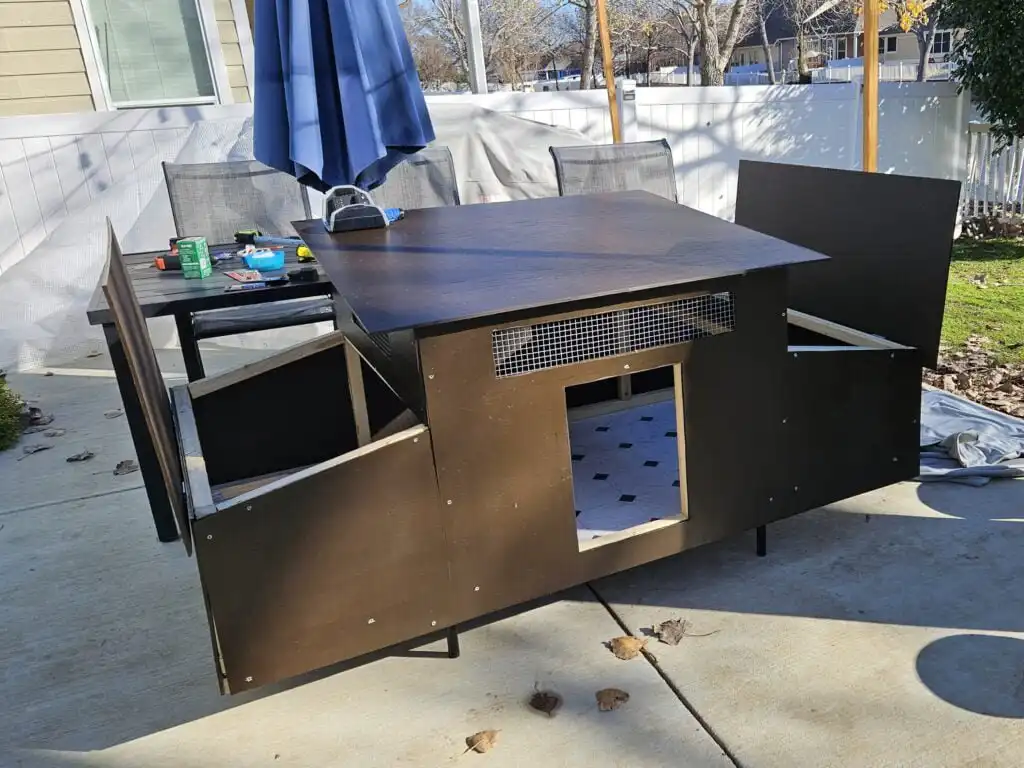
Make the side roofs with hinges so they can open easily for cleaning and egg collection.
7. Create the Door:
Cut out a door on one side of the house. Attach it with hinges and add a latch to keep it secure. Make sure the door is large enough for your ducks to enter and exit easily.
8. Build the Ramp:
Construct a ramp from plywood and 2x2s to allow your ducks to easily get in and out of the house. Ensure it is securely attached and has enough traction for your ducks to walk on comfortably.
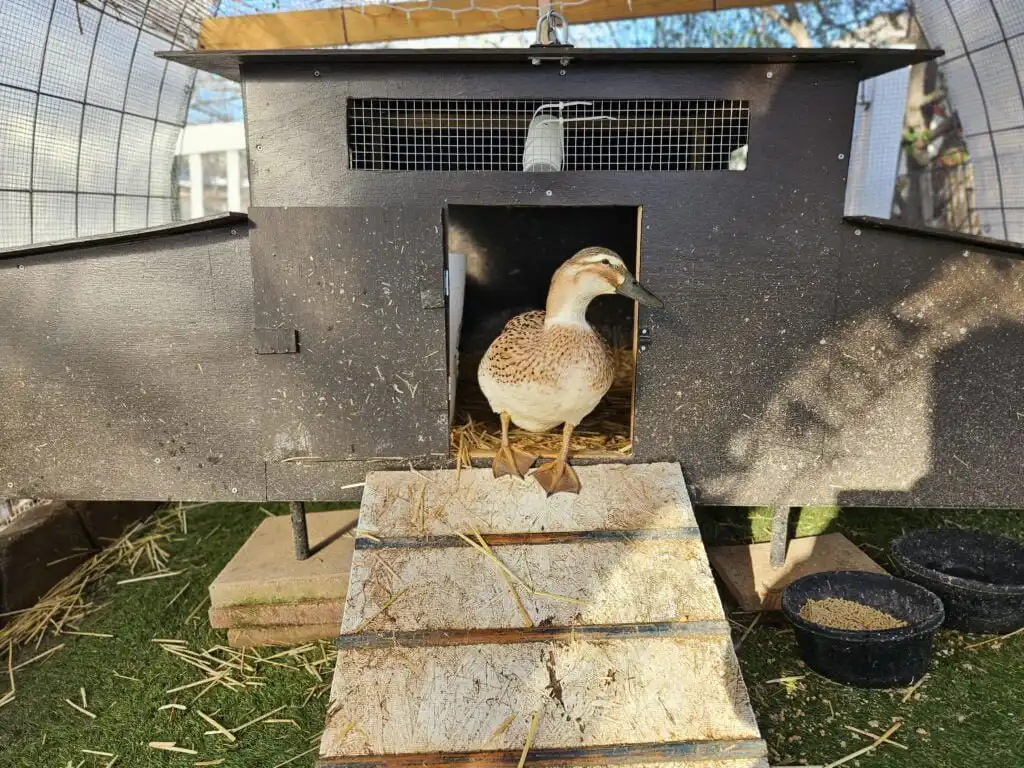
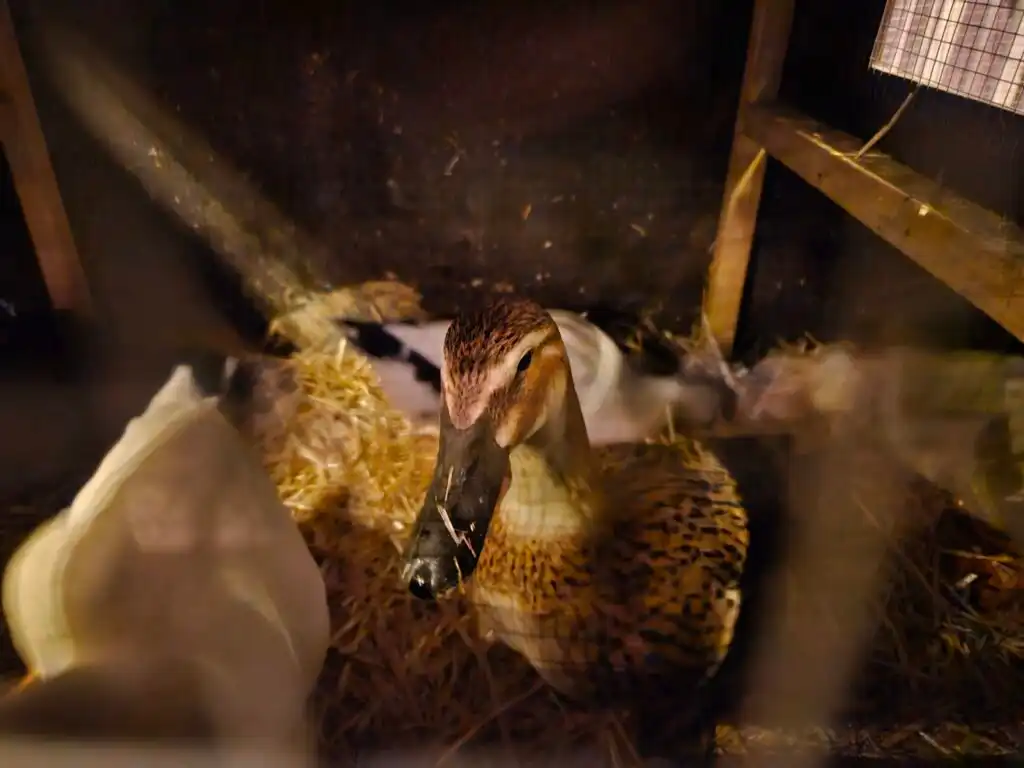
9. Add Bedding:
Line the floor of the duck house with straw or wood shavings to create a comfortable and absorbent bedding area for your ducks.
Special Features to Consider
- Predator Protection: Install a latch that can be secured against raccoons and other predators.
- Nesting Boxes: Include a few nesting boxes inside the house for your ducks to lay their eggs comfortably.
- Slanted Roof: A slanted roof is ideal for a DIY duck house because it directs rainwater away, preventing leaks and keeping the interior dry. It also aids in snow runoff, enhancing durability.
- Roof Overhang: A roof overhang is beneficial for a DIY duck house as it prevents rain from dripping down the walls, keeping the interior dry. It also provides shade, helping to keep the house cool in hot weather.
- Easy Cleaning: The hinged side roofs make it easy to reach for cleaning and egg collection.
- Vinyl Flooring: Adding vinyl flooring to the base prevents the plywood from becoming wet and makes cleaning a breeze.
- Camera: Installing a camera inside the duck house allows you to monitor your ducks’ health and behavior without disturbing them. It provides valuable insights into their daily activities, egg-laying patterns, and ensures they are safe and comfortable at all times.
- Ventilation: Proper ventilation in the duck house is crucial for maintaining good air quality and preventing moisture buildup. It helps reduce odors and keeps the environment fresh, promoting the health and well-being of your ducks. Ventilation also helps regulate temperature, making the house more comfortable year-round.
Final Touches
Ensure the duck house is in a shaded area to keep it cool during hot weather and protected from strong winds. Regularly clean the house to maintain a healthy environment for your ducks.
You can also add a custom coop sign or add their names or other decorative elements to their house.
DIY Duck House FAQ
What size should my duck house be?
A good rule of thumb is to provide about 4 square feet of space per duck. For a small flock of 4 ducks, a 4×4 foot house should suffice. Ensure the house is tall enough for your ducks to move around comfortably, around 2-3 feet high.
How important is ventilation in the duck house?
Ventilation is crucial for maintaining good air quality and preventing moisture buildup. It helps reduce odors and keeps the environment fresh, promoting the health and well-being of your ducks.
Why should I use vinyl flooring in the duck house?
Adding vinyl flooring to the base of your duck house makes cleaning easier and prevents the plywood from becoming wet, which extends the life of your duck house.
What are the benefits of a slanted roof?
A slanted roof directs rainwater away, preventing leaks and keeping the interior dry. It also aids in snow runoff, enhancing the durability of the house.
Why should I include a roof overhang?
A roof overhang prevents rain from dripping down the walls, keeping the interior dry. It also provides shade, helping to keep the house cool in hot weather.
How can I make cleaning the duck house easier?
Design the house with hinged side roofs, which allow easy access for cleaning and egg collection. Adding vinyl flooring also simplifies the cleaning process.
Should I install a camera inside the duck house?
Installing a camera allows you to monitor your ducks’ health and behavior without disturbing them. It provides valuable insights into their daily activities and ensures they are safe and comfortable.
What materials should I use for building the duck house?
Use plywood sheets for walls, floor, and roof; 2×4 lumber for framing; hardware cloth for ventilation; hinges and latches for doors and side roofs; nails and screws; non-toxic paint or stain for weatherproofing; roofing material like shingles or corrugated plastic; and vinyl flooring for easy cleaning.
Can I get help with cutting the plywood?
Yes, most hardware stores will cut the plywood to your specified dimensions, making it easier to transport and assemble.
How can I save money on materials?
Check the sale section of your local hardware store for discounted paint and other materials. You can also save money by using vinyl flooring scraps or remnants.
Where should I place the duck house?
Place the duck house in a shaded area to keep it cool during hot weather and protect it from strong winds. Ensure the area is dry and elevated to prevent flooding.
Conclusion
Building a DIY duck house is a fantastic way to provide your feathered friends with a safe and comfortable home. With a little effort and some basic materials, you can create a cozy haven that will keep your ducks happy and healthy. Happy building, and enjoy watching your ducks thrive in their new abode!
Have you built a duck house before? Share your tips and photos in the comments below! If you have any questions or need further guidance, feel free to ask. Let’s get quacking on those DIY projects together!
Related Articles
- 17 Duck Predators – Common And Not-So-Common Ones
- Super Easy DIY Duck House
- Building a Hoop Coop for Ducks with Cattle Panels
- What is the Best Bedding for Ducks?
- How to Build a Predator-Proof Duck Run: A Step-by-Step DIY Guide
- Creating the Perfect Home for Your Pet Ducks: Housing, Space, and Safety Tips
- Our New Duck Shed: How We Built an 8×8 ft Shed and Turned It Into the Perfect Duck House
Is your habitat optimized for safety? Return to the Habitat Guide for more research on predator-proofing and sanctuary design.
Coop looks good but a more specific list of lumber would make it more likely that people will do it.
Thanks for your suggestion! I will make sure to add more details to the post.